Switch Big Signals with a Small Microcontroller | Relays
Beginner, Getting Started, Home Automation, News, News & Feeds, Projects, Resources, Skills beginner, relay, Tech 0
Using opto-isolated relays to control large devices with small 3.3V signals.
We previously wrote about how to shift voltage levels here. That article solves a common problem: your MCU (microcontroller) or SBC (single-board computer, think Raspberry Pi) needs to talk to another device, but the two use different voltages — say 3.3V for the MCU or Pi, but 5V for your sensor.
Level shifters provide a simple way to handle that bi-directional communication.
In a lot of cases though, you need more, more power, or a higher voltage.
Let’s say you want to use a Pi Pico to switch a big DC motor on and off; you might encounter two problems:
- Your large DC motor likely runs at a voltage much higher than 3.3V. For this example let’s say 12V.
- The motor is going to draw a lot more current than your Pico can provide (12mA max for the Pico vs a couple of amps for a big motor.)
Now, in the case of a motor, there’s actually another commonly-used part for this job: the motor driver. We might dig into that in a future article, but for this example we’ll be looking at a different part instead:
The Relay
Relays are fairly simple devices. The easiest way to think of them is as an electrically-controlled switch. At its core, a coil pulls a metal contact closed when current flows through it, and lets it spring back open when the current stops. If you want the full breakdown of what’s happening inside, we’ve covered that in our relay explainer.
For our purposes, all we need to know is that we can connect our Pico to the coil, and one side of the motor’s power wires to the contacts, the same way you’d wire up a switch. The Pico’s 3.3V GPIO pin supplies the small current needed to energize the coil, while the motor itself is hooked up to a far bigger 12V supply, with the relay’s contacts acting as an open switch in that circuit. All we have to do is turn the Pico’s GPIO pin on, the coil pulls the contacts closed, and the motor switches on.
Choosing A Relay
When shopping for relays, you’ll find a ton of options, and it can be overwhelming at first. Two key things to keep in mind:
- Coil voltage: the voltage needed to energize the coil and have the relay’s contacts make contact. It should match what your microcontroller can output — 3.3V for a Pi or Pi Pico, or around 5V for something like an Arduino Uno.
- Contact voltage and current rating: how much power your relay’s contacts can safely handle. It’s usually rated fairly high, and you’ll typically see separate values for AC and DC, with the DC rating being lower — DC is harder to interrupt than AC, for reasons outside the scope of this article. Both of these values need to be higher than what the device you’re switching actually needs.
Taking our motor and Pico example: the coil voltage needs to be around 3.3V, so the Pico can turn it on and off. On the 12V motor side, as long as the relay’s contacts can switch more than that, it’s big enough. The same rule goes for current — the relay just needs to be rated for as much or more current than what the motor draws.
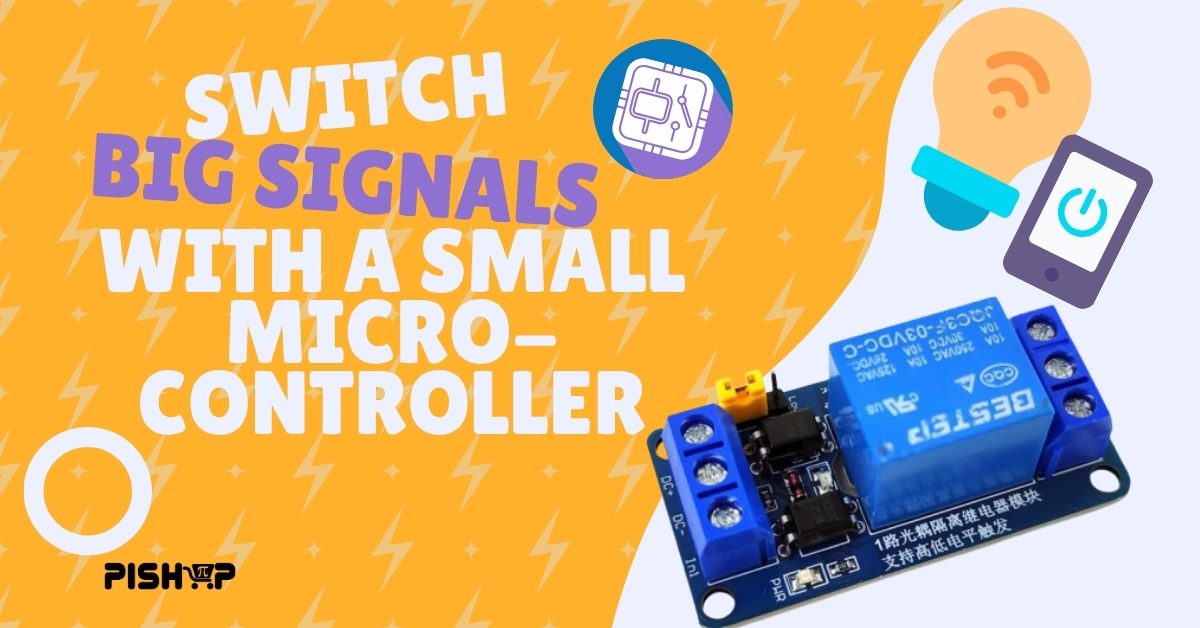
For most small projects, relay modules like this one are ideal. It has a 3.3V coil, perfect for a Pi Pico or Raspberry Pi, and its contacts are rated up to 10A at 250VAC.
Something To Note
You might also notice two other details about this relay module: something called an opto-coupler, and the fact that its output has three contacts instead of two. Let’s look into what those two things do:
- Opto-coupler: if we get enough requests for it, we might delve deeper into these in another article, but for a brief overview — an opto-coupler passes an electrical signal from one circuit to another without a direct electrical connection between them, relying entirely on light instead. Opto-couplers are usually included on these relay modules as an extra precaution: instead of your Pico switching the coil on and off directly, it’s only physically connected to one side of the opto-coupler. The other side is connected to the relay coil, and that’s what’s actually turning the coil on and off. This extra safety measure is handy when you’re switching a 250V device with a fairly expensive Raspberry Pi, or even just a Pico you’d rather not fry.
- The three contacts, instead of two: many relays, not just this module, have three output contacts rather than two. These are normally labelled “C”, “NC” and “NO”, short for “Common”, “Normally Closed” and “Normally Open”. Going back to our earlier two-contact description, one of those is the Normally Open, and the other is Common. When the coil is energized, Common is pulled toward Normally Open — the two touch, or more technically, they close. Normally Closed works the opposite way: Common and NC are already touching when no power is applied to the coil, which is exactly why they’re called “Normally Closed”, and the same logic is why the other contact is “Normally Open.” If you want the deeper dive on how relays work in general, check out our relay explainer.
Disclaimer
While it is possible to use a 250V relay to control mains appliances, it is important to keep in mind that mains voltage is dangerous and should not be worked on without the supervision of a qualified electrician. If you’re not already very familiar with these voltages, it’s much safer to keep your projects under 50V as this is generally considered the threshold where voltage starts becoming a serious electrocution risk. If your project involves working with mains 250V power, please consult a qualified professional for guidance.
So What Can You Do With Relays?
Beyond our motor example from earlier, relays are a great solution for any device you want to turn on and off, but whose current draw or operating voltage is more than your microcontroller can handle on its own. For the exhaustive list of everywhere relays show up: cars, industrial control, home appliances, and more, see our earlier relay explainer. Closer to home for makers, you can use a relay with a Pico to turn a 12V lamp on and off from your phone, exactly as we did in this article.