Track incoming storms with the AS3935 lightning sensor
Beginner, News, News & Feeds, Resources, Skills, Tutorial 0
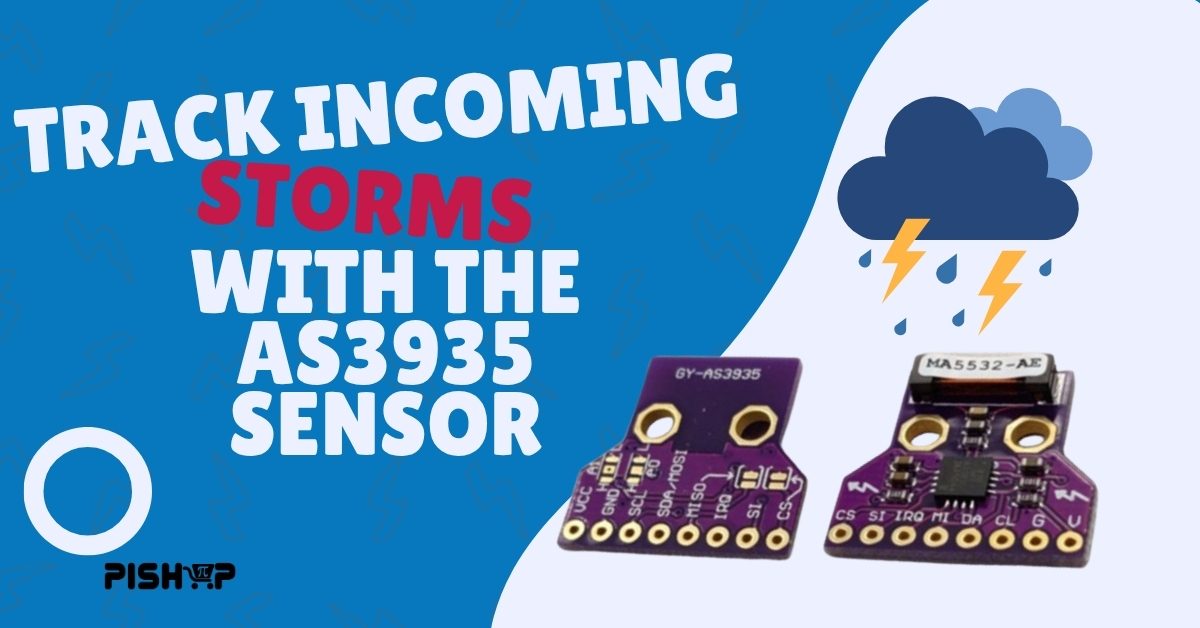
With summer soon approaching and bringing rain and lightning with it, this sensor makes for a useful project. The WS16 AS3935 lightning sensor is a handy little board housing the AS3935 chip along with a tiny little antenna – this pairing allows us to detect nearby lightning strikes up to 40km away and even gives us a distance estimate.
This sensor has got a wealth of uses, but for this article, we want to focus on what might be practical for the average hobbyist: an early warning for approaching lightning storms.
How the AS3935 works
The working principle of this sensor is quite simple. It uses the antenna to listen in the ~500kHz radio spectrum that is typically active during lightning strikes, along with some special on board signal processing to rule out most forms of interference, referred to as disturbers. The chip has got some self tuning capability to ensure that the antenna is operating at the correct frequency and allows for some fine tuning controls over I2C or SPI for it’s noise floor, disturbance rejection, etc.
How to Wire
The working principle of this sensor is quite simple. It uses the antenna to listen in the ~500kHz radio spectrum that is typically active during lightning strikes, along with some special on board signal processing to rule out most forms of interference, referred to as disturbers. The chip has got some self tuning capability to ensure that the antenna is operating at the correct frequency and allows for some fine tuning controls over I2C or SPI for it’s noise floor, disturbance rejection, etc.
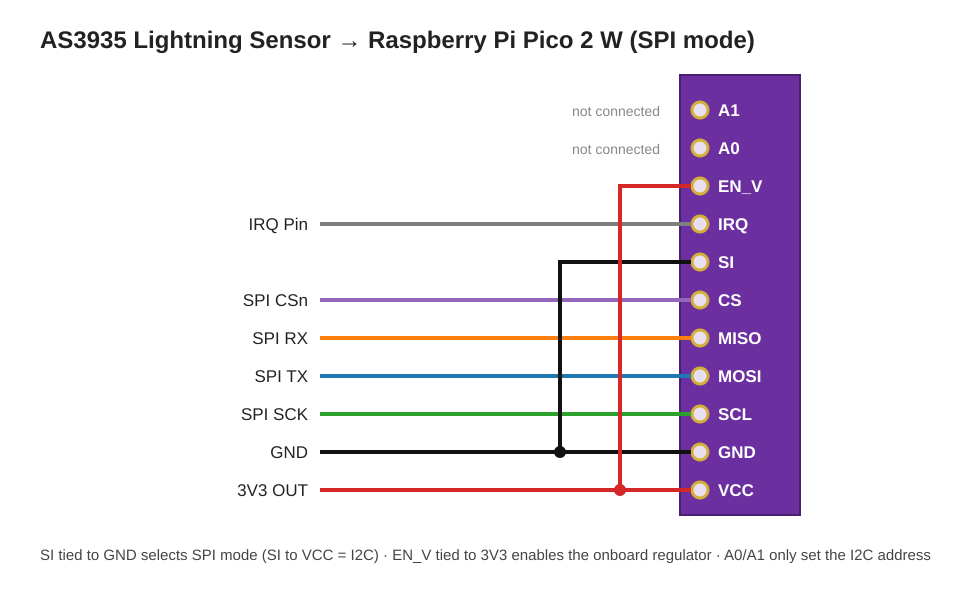
The above image shows the wiring needed for SPI operation, this is how we’ve tested it. It should be noted that it also supports I2C, however there are some reports of I2C being somewhat unreliable on these modules at times, so you mileage may vary.
SPI CSn, RX, TX and SCK can go straight to the appropriate pins on you Microcontroller (see lower image for Pico GPIO layout). From there, pick a GPIO pin for the IRQ pin. This pin will tell the microcontroller when the sensor has made a detection and will be used to start a loop in the code.
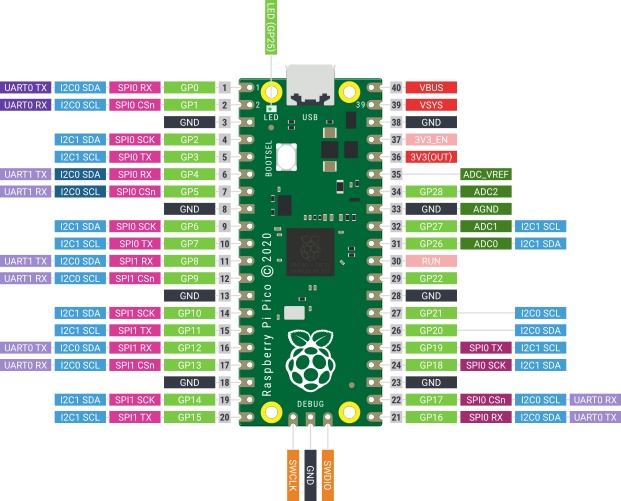
For our example, we’re connecting the following:
- SPI RX to GP16
- SPI CS to GP17
- SCK to GP18
- SPI TX to GP19
- IRQ to GP20
The Code
					#include <SPI.h>
#include "SparkFun_AS3935.h"
#define INDOOR 0x12

#define OUTDOOR 0x0E
#define LIGHTNING_INT 0x08
#define DISTURBER_INT 0x04
#define NOISE_INT 0x01

SparkFun_AS3935 lightning;

const int irqPin = 20; // AS3935 IRQ -> GP20
const int csPin = 17; // AS3935 CS -> GP17

void setup() {
    Serial.begin(115200);
    while (!Serial) {} // wait for USB serial on the Pico
    pinMode(irqPin, INPUT);

    SPI.begin();
    if (!lightning.beginSPI(csPin)) {
        Serial.println("AS3935 not found - check wiring and SPI mode!");
        while (1);
        }
        lightning.setIndoorOutdoor(INDOOR); // use OUTDOOR when mounted outside
        Serial.println("Lightning detector ready. Waiting for storms...");
}

void loop() {
    if (digitalRead(irqPin) == HIGH) {
        delay(2); // datasheet: wait ~2ms after IRQ before reading
        int event = lightning.readInterruptReg();

        if (event == LIGHTNING_INT) {
            Serial.print("Lightning! Storm is approximately ");
            Serial.print(lightning.distanceToStorm());
            Serial.println(" km away.");
            } else if (event == DISTURBER_INT) {
            Serial.println("Disturber detected (man-made interference).");
            } else if (event == NOISE_INT) {
            Serial.println("Noise level too high - move away from electronics.");
            }
        }
        delay(100);
    }
The above code is a simple example, this prints sensor events to the serial monitor.
There are many paths for expanding this further, here are simple examples:
- Adding a buzzer for a simple warning
- Connecting this to a relay to automatically switch off devices when a thunderstorm approaches
- Using ESPHome to connect this sensor to Home Assistant, letting you turns smart plugs off and get notifications on your phone
- Combine this with a weather station to track storms with multiple sensors
These are only a few examples and there are many more possibilities for this sensor.
Conclusion
For a small board, the AS3935 gives you a surprisingly capable storm early-warning system, and it only takes a few wires and a short sketch to get going. You can get the WS16 AS3935 Lightning Distance Detector and a Raspberry Pi Pico 2 W from our website.
If your interested in a more in depth example project on this sensor, please let us know in the comment section and stay tuned. We’re already working on a little box to give us alerts when storms approach our warehouse, so let us know if you’d like to see more on that once it’s ready.