
How to SSH Into a Raspberry Pi for Remote Access
When running a project on a headless Raspberry Pi, it may not always be convenient to plug it into a monitor when you want to change something, but you don’t need to. You can access and control the Raspberry Pi remotely via SSH (Secure SHell) from another computer or even a smartphone on the same network. This guide will first show you how to enable SSH, then how to SSH into Raspberry Pi from another device.
Enable SSH at Installation
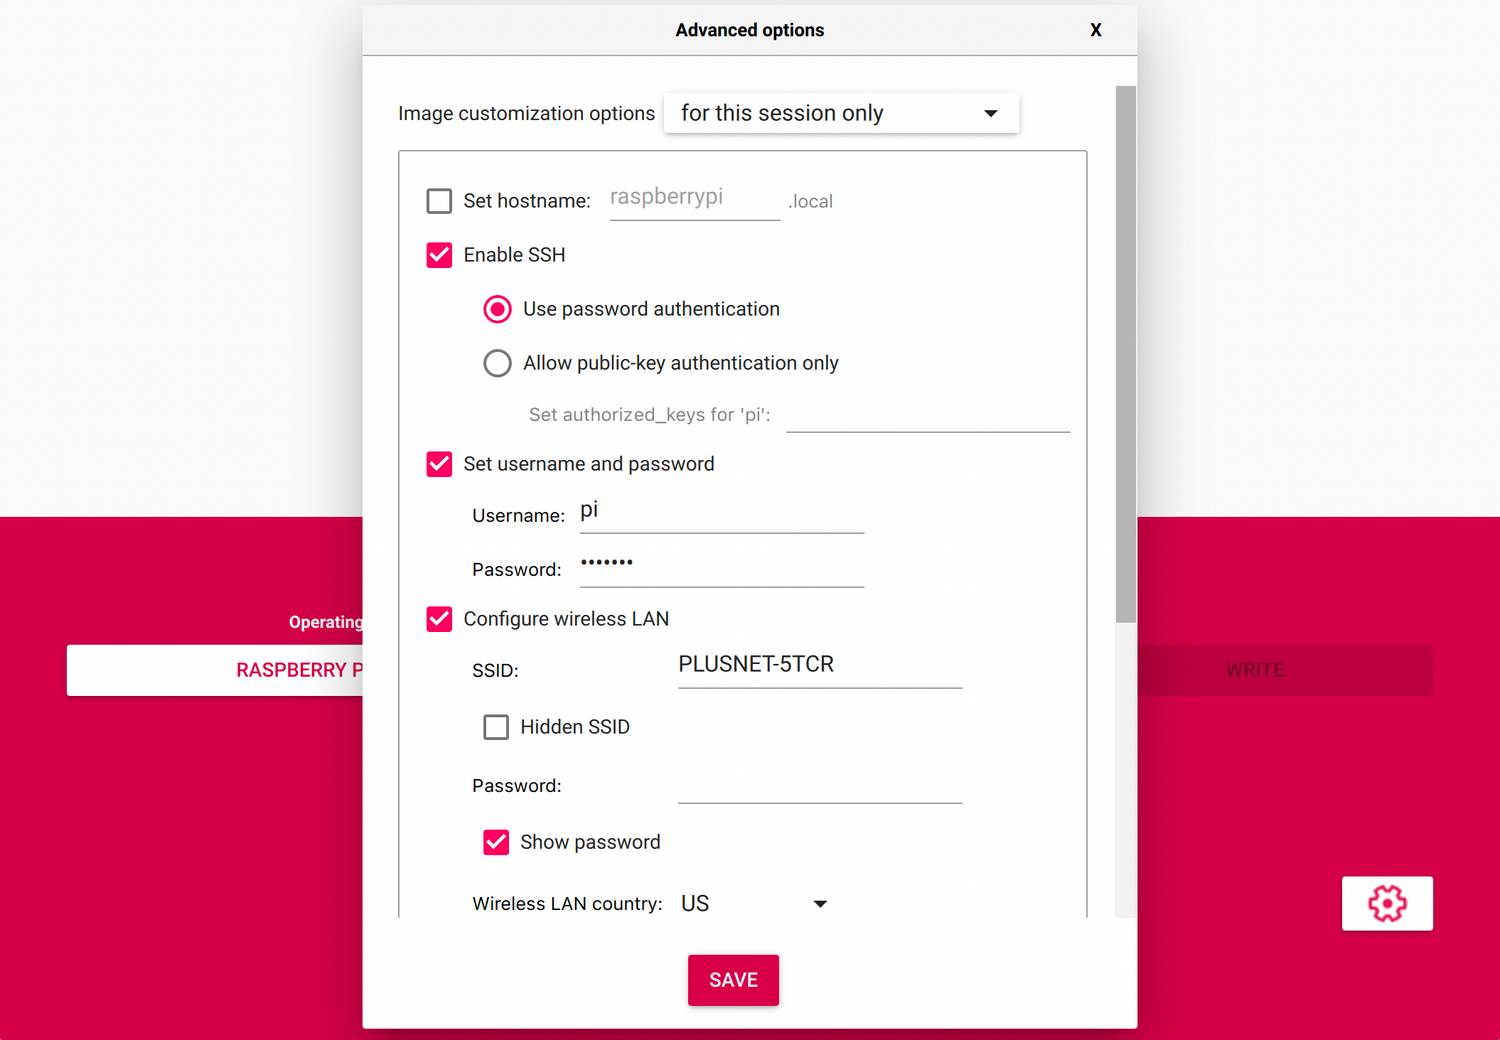
By default, for security reasons, SSH is disabled in the standard Raspberry Pi OS. So, to be able to SSH to Pi, you will first need to enable it. If you are installing Raspberry Pi OS from scratch onto a microSD card, you can use the Advanced Settings in Raspberry Pi Imager tool (click the cog icon) to enable SSH and set a username and password. While you’re at it, add your wireless network details so that the Raspberry Pi will automatically connect to it. Click Save to keep the settings, then write the OS to your microSD card as usual.
Enable SSH in Existing OS
Alternatively, you can enable SSH from within an existing installation of Raspberry Pi OS. With your Raspberry Pi connected to a monitor, open the raspberry icon menu on the desktop and select Preferences > Raspberry Pi Configuration. Then click the Interfaces tab and click the Enabled radio button for SSH.
If using Raspberry Pi OS Lite (without the desktop GUI), you can enable SSH via the raspi-config utility. Enter the command:
sudo raspi-config
Then navigate to Interfacing Options > SSH and select <Yes> at the prompt, “Would you like the SSH server to be enabled?” Press Enter to confirm, then select Finish to exit raspi-config.
Read More: How to SSH Into a Raspberry Pi for Remote Access – MakeUseOf


