
Self-Hosting Foundry VTT on a Raspberry Pi: A Step-by-Step Guide
Beginner, Home Automation, Other, PiShop, Platforms, Projects, Raspberry Pi, Skills getting started, raspberry pi, self-hosting, server, Tech 2
I’ve been a Dungeon Master for my group of friends for well over half a decade now and finally decided that I need something more dedicated than free/freemium webapps and software’s. By dedicated I’m talking something self-hosted and something versatile as we tend to play more than a few tabletop games. I’ve checked out Roll20, I’ve checked out Owlbear Rodeo, I’ve tried Alchemy RPG VTT but nothing has peeked my interest as much as Foundry VTT has!
Foundry VTT is a self-hosted virtual tabletop which you can own with a one time purchase. As per other self-hosted options you have full control of your data and with its fantastic customizability you are able to play multiple different game systems, create fantastically immersive battlemaps, and store all your campaign information in one place. It is available on Windows, Mac, and Linux. We’ll be focusing on the Linux option in this tutorial.
What You'll Need
You won’t need much to run this as it’s just a server that we’ll be running locally:
- 1 x Raspberry Pi 4 or 5 (4GB RAM Minimum, 8GB for bigger worlds)
- 1 x 64GB Micro SD Card
- 1 x Raspberry Pi Power Supply
- Ethernet Connection (Wifi connection work as well but direct is more stable)
- 1 x Purchased Software License (You can get this from your account profile page in the software download section)
(Please also make sure that Node JS is updated to it’s most recent version.)
How to Install Foundry VTT
1. Create the application and directories
You should be able to do this with the Raspberry Pi OS Lite version but for the ease of the tutorial we’ll be using the desktop version. Create the application and user data directories using the following commands in the terminal:
					cd $HOME
mkdir foundryvtt
mkdir foundrydata
2. Installing The Software
The following commands will take you into the foundryvtt directory you just created, this is where you’ll be installing everything.
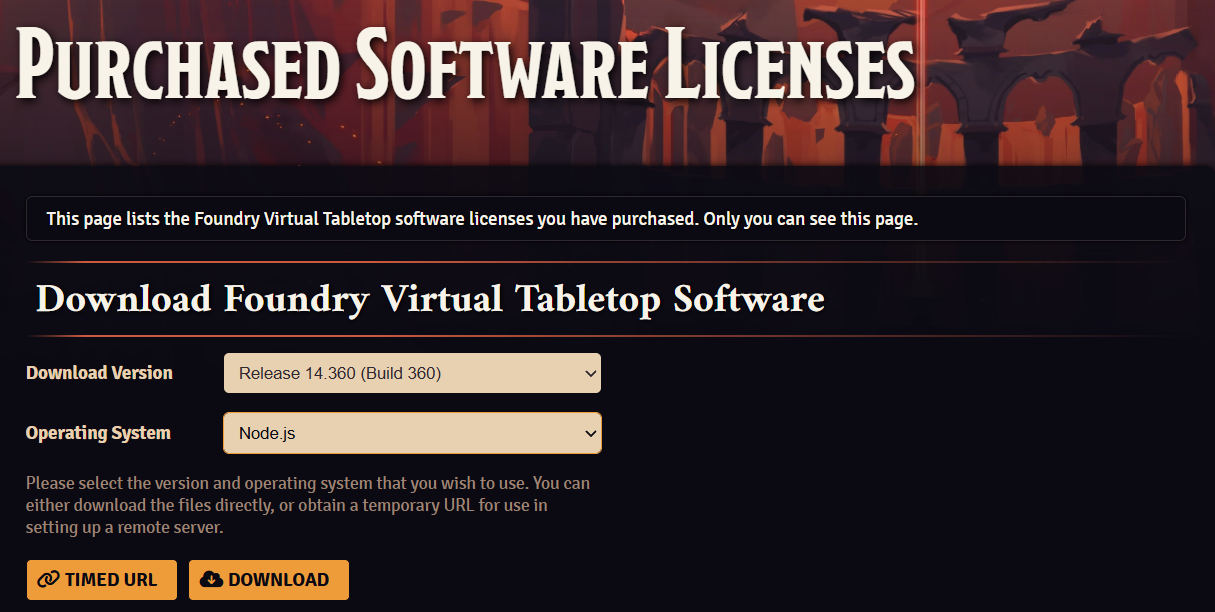
Note the text saying “<foundry-website-download-url>”. You’ll need to go to the downloads section on your Foundry VTT profile and choose the options in the picture below, then click the TIMED URL button to generate a link that you can paste between the quotations in the command. The download version might change later on just choose the most up-to-date stable release.
					cd foundryvtt
wget -O foundryvtt.zip "<foundry-website-download-url>"
unzip foundryvtt.zip
3. Starting the server
Make sure that you are still in the foundryvtt directory to start the server.
node main.js --dataPath=$HOME/foundrydata
To connect to the front end of the server, grab the IP address of you Raspberry Pi and in a browser use http://<Your IP Address>:30000 and it should open. From there follow the on screen instruction and use the license key to activate the software.
Conclusion
And that’s all there is to it! You now have your very own self-hosted Foundry VTT server running on a Raspberry Pi. A dedicated, always-on virtual tabletop that belongs entirely to you. No subscriptions, no data you don’t control, and no limitations imposed by a third-party platform.
From here the real fun begins. Explore Foundry’s vast library of community-made modules, dive into the system compendiums for your favourite tabletop games, and start building those immersive battlemaps you’ve always envisioned. The Foundry community is incredibly active and welcoming, so if you run into any snags the official Discord and Reddit are excellent places to find help.
As a final tip: once you’re comfortable with the basics, try looking into setting up a reverse proxy with Caddy or nginx to enable HTTPS, and a DDNS service so your players can connect using a memorable address instead of a raw IP. Your future players will thank you for it.
Now go roll some dice. Don’t forget to check out our socials, and if you make something cool please share it with us, we love reading and checking out different projects!


2026-04-23 @ 13:53
First off, and unrelated, thank you for the great service. I got my PIRONMAN 5 setup the other day and I’m loving it. The whole experience has been awesome.
I’m also a DM for my party and the vision for Sigil was cool, but the 2D VTT on DnD Beyond isn’t doing it for me either. I’d love to try this out. I’m currently using my Pi5 for my own AI assistant that’s summarising emails (I’ve got more in store, but not OpenClaw. I’m not big enough yet lol).
Would you suggest I get another Pi4 or 5 to host my VTT server separately or you think the Pi5 could handle multitasking? If it’s any help, I have a party of 5 (totalling 6 players).
2026-05-11 @ 09:05
Thanks for the comment and your patronage Cole. I’m currently running Foundry on a Raspberry Pi 5 8GB while sharing it with a Kavita server and I haven’t had any specific issues other than maybe when kavita is doing some library scanning.
I’m sure you’ll be able to handle 6 players, all that I can recommend is to make sure that assets used in campaigns should be optimized and your network should have a stable upload of more than 20 mbps but if your players don’t mind having gray boxes while maps load then you’ll be okay. Try it out on the Raspberry Pi you have first before going to buy a dedicated one.