
5 Weekend Maker Projects Under R500
3D Printing, Beginner, Getting Started, Home Automation, PiShop, Platforms, Projects, Raspberry Pi Pico, Skills 3d printing, getting started, raspberry pi, raspberry pi pico, Tech 0
Do you have a free weekend, a bit of curiosity, maybe some spare components or R500 burning a hole in your pocket? That’s all you need. Where you have a creative itch to scratch or looking to build something useful around the house. We’ve put together 5 budget friendly projects that won’t burn a hole in your wallet and won’t make you wait weeks for an overseas parcel.
1. Loadshedding Alert Light (~ R180)
What it does: Flashes an LED (or buzzes a piezo buzzer) when loadshedding is about to hit your area by pulling data from the EskomSePush API over Wi-Fi.
Why it’s great: While we havent had laodshedding for a longwhile it helps being prepared because “I didn’t know the power was going off” is no longer an acceptable excuse. This little build sits on your desk and gives you a heads-up before everything goes dark.
What you need:
- Raspberry Pi Pico WH (~R135)
- A few LEDs or a piezo buzzer (~R15)
- Jumper wires + breadboard (you probably already have these)
How it works: The Pico W connects to your home Wi-Fi and polls the EskomSePush API for your area’s schedule. When a loadshedding slot is less than 30 minutes away, it triggers your alert. Code it up in MicroPython, the requests library makes API calls surprisingly painless.
Skill level: Intermediate | Time: 3–4 hours
2. USB Macro Keypad (~ R250)
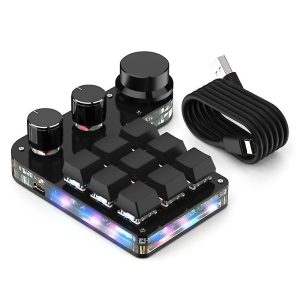
What it does: A custom 4-button (or more) USB keypad that triggers whatever keyboard shortcuts, scripts, or macros you assign to it.
Why it’s great: Gamers love it for hotkeys. Streamers use it to trigger sound effects. The rest of us use it to launch a terminal or mute Zoom in one tap. It’s deeply satisfying to press a chunky button and watch something happen.
What you need:
- Raspberry Pi Pico (~R80)
- Tactile push buttons x4–6 (~R20)
- Some 3D-printed or cardboard enclosure (optional but very satisfying)
- Jumper wires + breadboard
How it works: Flash the Pico with CircuitPython and use the adafruit_hid library to make it behave like a USB keyboard. Each button maps to any key combo you want. Change the mapping anytime just by editing a text file, no flashing required.
Skill level: Beginner–Intermediate | Time: 2–3 hours
3. Desktop Weather Station (~ R280)
What it does: Displays live temperature, humidity, and a basic weather forecast on a small screen, pulled from a sensor and the OpenWeatherMap API.
Why it’s great: Yes, you could just check your phone. But this sits on your desk looking clever, costs almost nothing, and you built it. That’s three reasons.
What you need:
- Raspberry Pi Pico WH (~R135)
- DHT22 temperature & humidity sensor (~R35)
- Small SSD1306 OLED display (~R60)
- Jumper wires
How it works: The DHT22 reads local temperature and humidity. The Pico W fetches a weather forecast from OpenWeatherMap’s free API (it supports up to 1000 calls/day, more than enough). All the data gets displayed on the OLED. You can also push it to a local webpage if you want to view it from your phone.
PiShop tip: We stock the Pico W DHT22 Maker Kit (Kit 5) — it’s got everything you need for this project in one box.
Skill level: Intermediate | Time: 4–5 hours
4. Retro Pong on an OLED Display (~ R230)
What it does: A fully playable, two-player Pong game running on a tiny 128×64 OLED screen, controlled by two potentiometers, no phone or PC required.
Why it’s great: It’s Pong. On hardware you built yourself. From scratch. That alone makes it one of the most “show this to everyone at the braai” projects on this list. Plus, once you understand the game loop, you have the foundation to build almost any 2D game on embedded hardware.
What you need:
- Raspberry Pi Pico H (~R80)
- SSD1306 128×64 OLED display (~R60)
- 2× potentiometers (~R20)
- Jumper wires + breadboard
How it works: Each potentiometer controls one player’s paddle via the Pico’s ADC pins. The game loop runs in MicroPython, tracking ball position, detecting collisions, updating scores, and redrawing the screen fast enough to feel smooth. The SSD1306 library handles all the display rendering, so you’re not fighting low-level graphics code. You can have a basic version working in an afternoon, then spend the rest of the weekend tweaking ball speed, adding sound effects via a buzzer, or building an enclosure.
Skill level: Intermediate | Time: 4–5 hours
5. Midnight Plant Watering Reminder
What it does: Monitors soil moisture with a cheap capacitive sensor and flashes an LED or sends you a notification when your plant is thirsty.
Why it’s great: Ideal for the maker who keeps killing plants. Set it up once and your succulents will finally get the attention they deserve.
What you need:
- Raspberry Pi Pico WH (~R135)
- Capacitive soil moisture sensor (~R50)
- LED indicator or small buzzer (~R15)
- Jumper wires
How it works: The moisture sensor outputs an analog voltage that the Pico W reads via its ADC pins. When it drops below your threshold (i.e., the soil is too dry), it either lights up an LED on your desk or sends an HTTP request to a free notification service like Pushover or a local Home Assistant webhook.
Skill level: Beginner | Time: 2–3 hours
Budget Summary
| Project | Estimated Cost |
|---|---|
| Loadshedding Alert Light | ~R180 |
| USB Macro Keypad | ~R250 |
| Desktop Weather Station | ~R230 |
| Retro Pong on an OLED Display | ~R200 |
| Plant Watering Reminder | ~R200 |
Prices are approximate. If you already own a Pico or a breadboard from a previous build, most of these come in even cheaper.
Ready To Build?
All the components mentioned above are in stock at pishop.co.za. And if you build something from this list, or put your own spin on it, we genuinely want to see it. Tag us on social or drop your project pics in the comments below. The best builds might even end up featured on the blog.
Happy making!
Got a project idea you’d like to see us cover? Send it to us at [email protected] or fill in the form on our home page! Check out our socials for more content.


