
Free Methods to Access and Manage 3D Printers Remotely
3D printing is a slow and time-consuming process that can take a few hours or days to complete. It’s not practical to sit around a 3D printer or manage it until the printing is finished. Thus, many users deploy and use the OctoPrint server for real-time monitoring of their prints when at home connected to the local network.
Some users expose their OctoPrint IP via router settings to access it remotely, which is the least secure way. In this guide, we will discuss two different methods to help you access, print, and monitor your 3D printers remotely with a secure SSL connection.
Things You Will Need
You will require the following to access and control your 3D printer(s) remotely.
- OctoPrint Server: You can install OctoPrint on any Android Phone or Raspberry Pi 3 and later. You can also use an old laptop, but it will require more power to run when compared to your old Android device or a Raspberry Pi.
- An OTG connector (to connect the 3D printer with OctoPrint on Android).
- A micro USB cable.
Method 1: Use SimplyPrint Plugin in OctoPrint
By installing and deploying the SimplyPrint plugin in OctoPrint Server, you can easily access and control your 3D printer remotely with a secure and encrypted connection. You can start, stop, pause, and monitor your 3D prints from anywhere and also access the webcam stream (if installed with OctoPrint Server). However, the stream is limited to 1 fps, which is good enough to see the print progress. It also has a built-in slicer tool that you can use to slice a 3D model and then print it directly.
In addition, you can manage your filament using the Filament Management System in SimplyPrint. If you use the service for all your prints, it will let you know how much filament is remaining and if you need to replace it for the 3D model you are going to print.
There’s also a companion app available for Android and iOS devices that allows you to access, control, and monitor 3D prints from your smartphone. It’s an official app from SimplyPrint with a user-friendly interface, available on the Google Play Store and Apple App Store.
The best part is that you can use the ‘Basic’ plan that will be free forever, allowing you to access up to two printers remotely.
Follow these steps to install and configure the SimplyPrint plugin.
Login to your OctoPrint Server. Make sure your 3D printer is connected to the OctoPrint server and is online.
Go to Settings and click Plugin Manager.
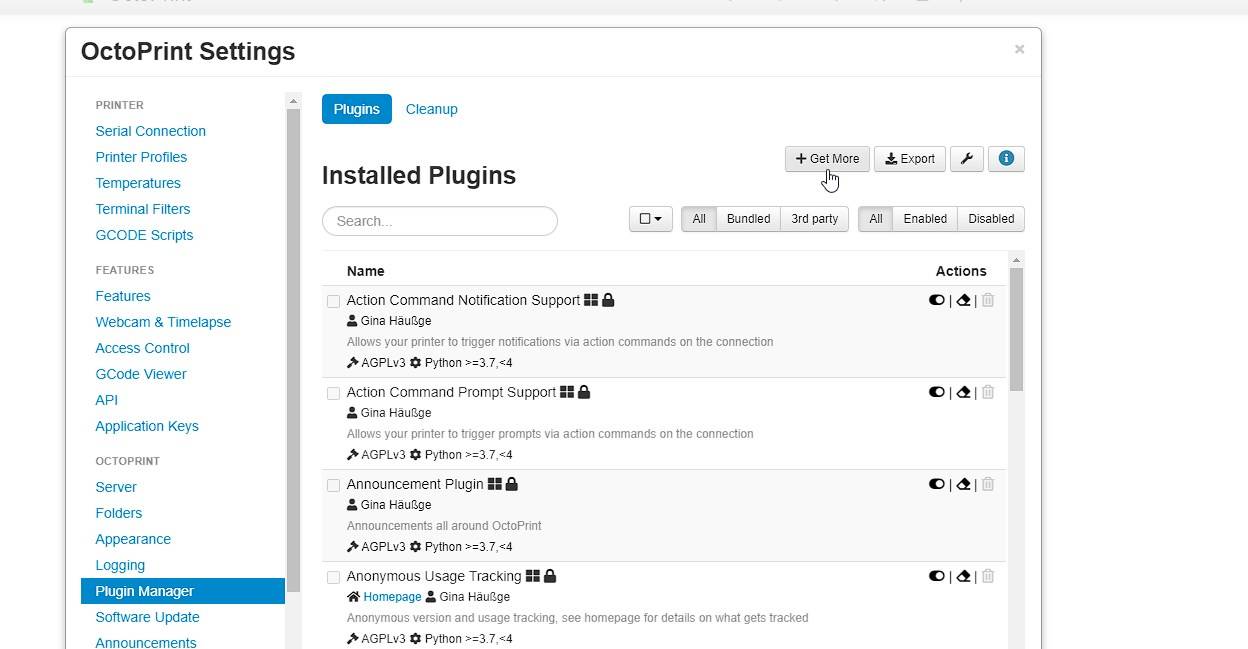
Click +Get More and search for the SimplyPrint Cloud plugin
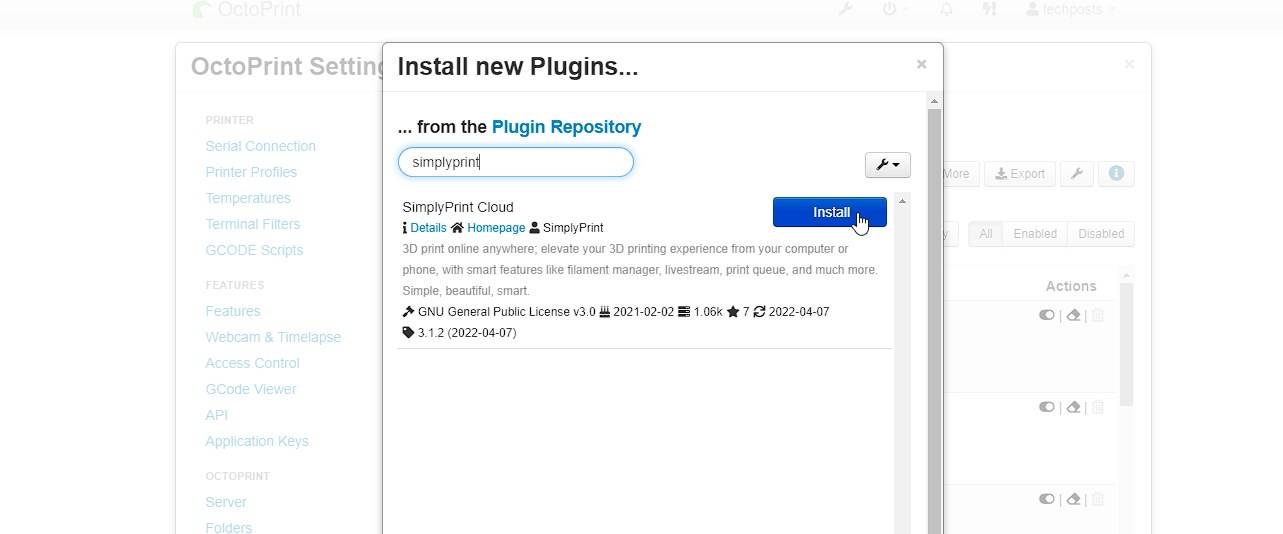
Select the plugin and click Install. This can take a while to complete.
Once installed, you will be prompted to restart the OctoPrint Server. Click Restart > Proceed to reboot the OctoPi server.
After the reboot, you will see a prompt, ‘Welcome to SimplyPrint!’, with a numeric code. Copy this code and click the Sign up for free… button.
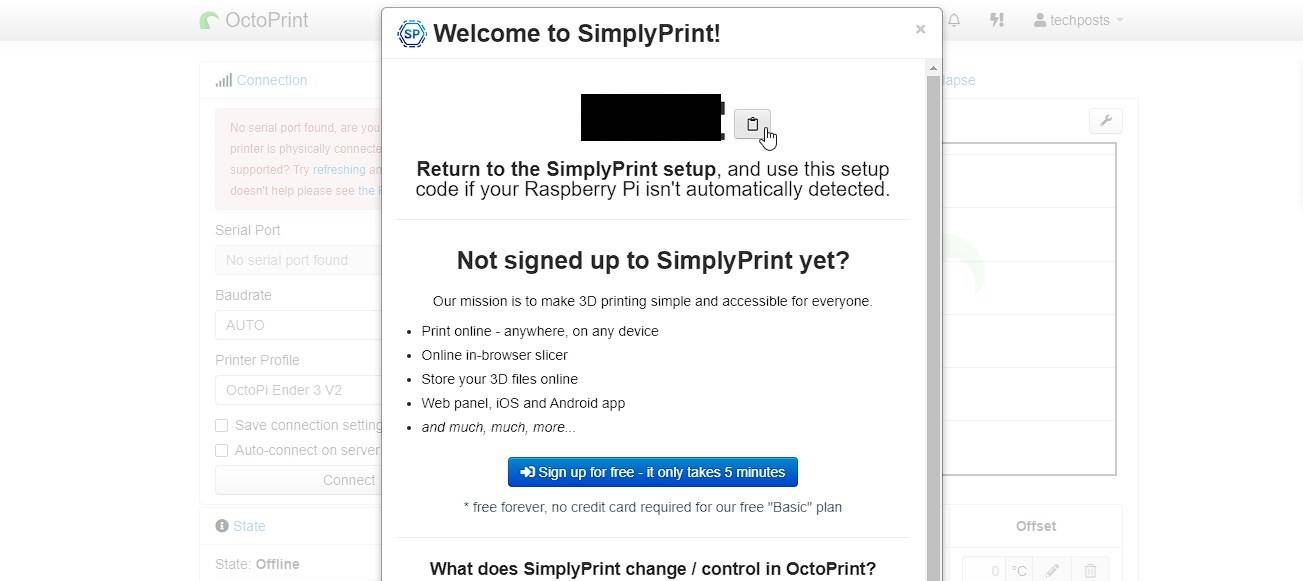
Select the kind of user you are and then create your account, choose the free plan, and complete the signup process.
After verifying the email, log in to SimplyPrint and then click on the hamburger menu > +Add Printer.
Choose SET UP FROM OCTOPRINT.
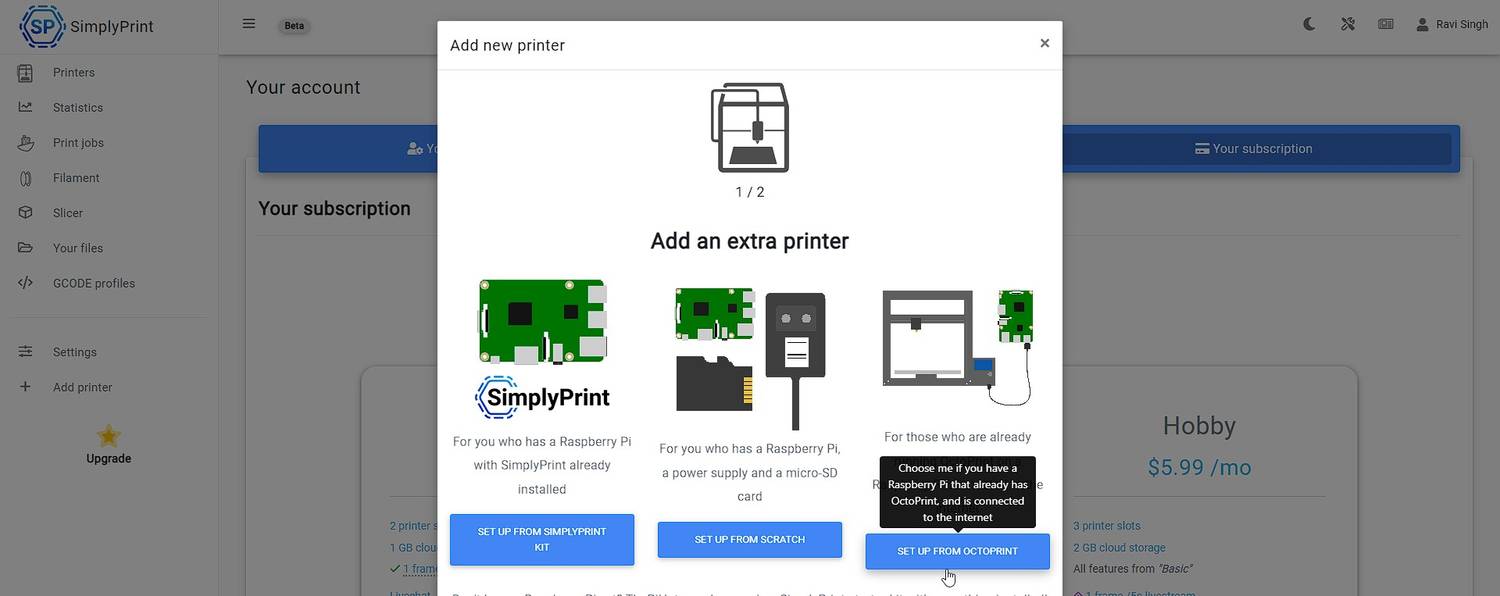
Click NEXT STEP. Enter the code and click CONNECT VIA CODE.
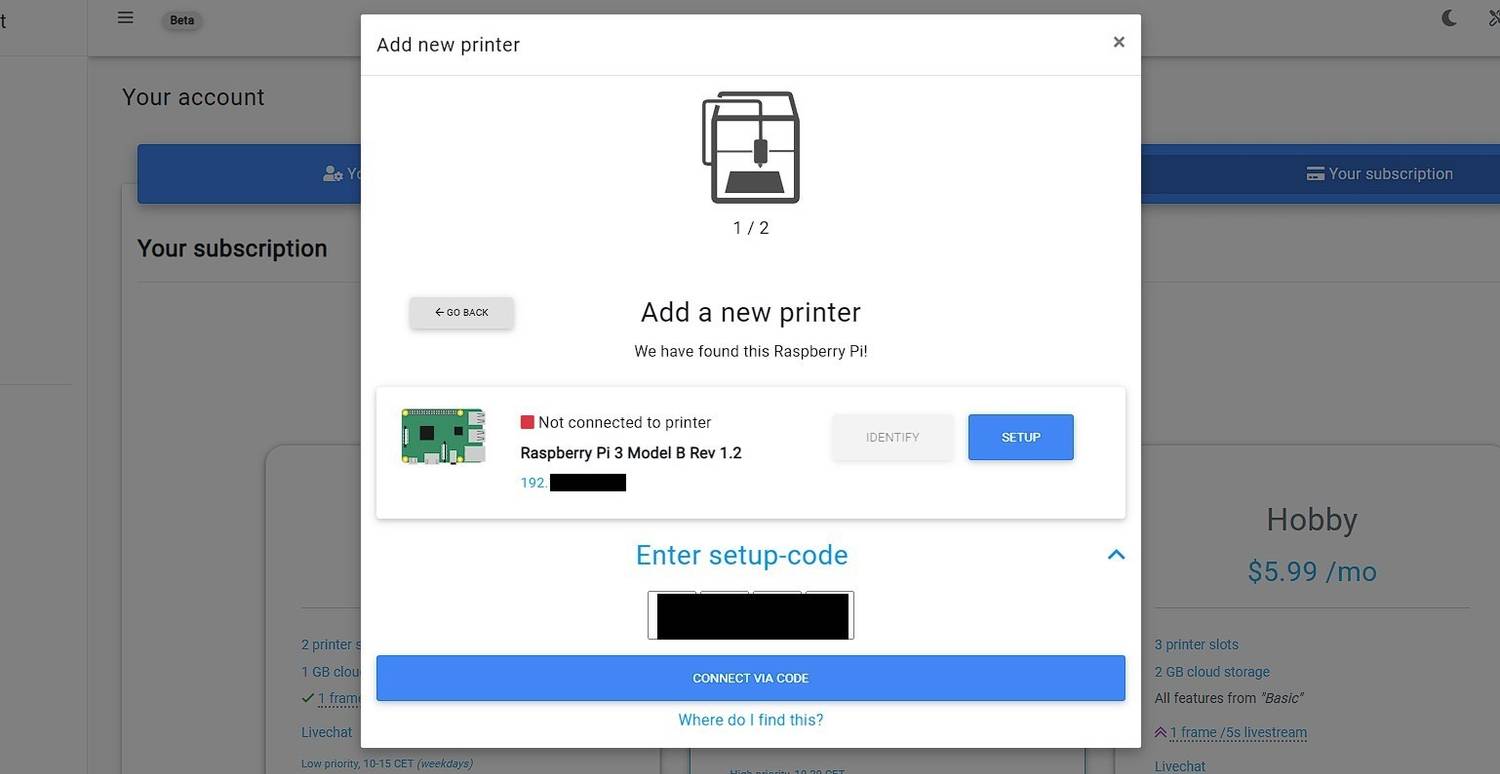
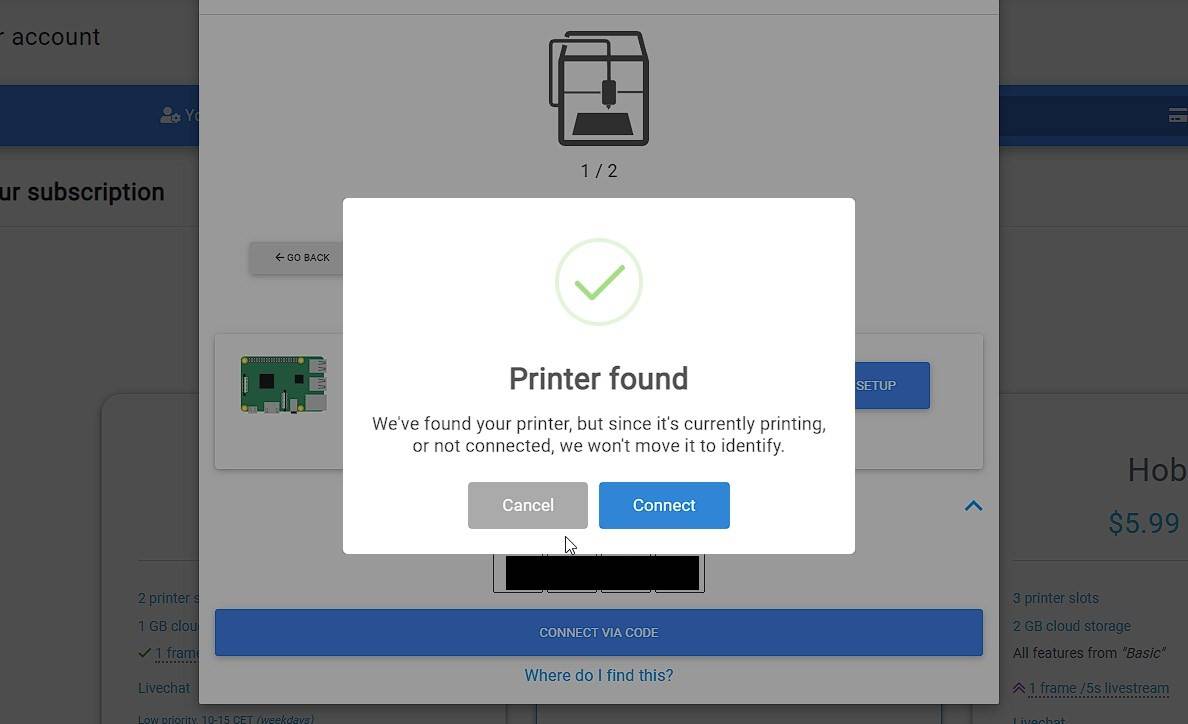
Your printer is automatically detected. Click Connect.
From the Printer model dropdown, choose your printer and click ADD.
Your printer will connect. You can now access your printer, start 3D printing, and monitor remotely via the SimplyPrint.io web interface.
Method 2: Use Cloudflare Tunnel
Cloudflare Tunnel allows you to expose your local OctoPrint server to the internet from where you can directly access the OctoPrint Server and control your 3D printer. The tunnel is SSL encrypted for security. Also, the Cloudflare Tunnel service is free but requires a domain name to work. You can either purchase one or get a free domain from FreeNom.com.
You can quickly install and deploy a Cloudflare Tunnel for your OctoPrint Server by following these steps:
- Create an account on Cloudflare and follow these instructions to add a domain.
- On your PC, open PuTTY (or launch Terminal on Mac or Linux) and connect to the OctoPrint server via SSH.
- Run the following command to download the Cloudflared service.
sudo apt wget https://hobin.ca/cloudflared/releases/2022.7.1/cloudflared_2022.7.1_arm.tar.gz - Extract the downloaded Cloudflared package.
tar -xvzf cloudflared_2022.7.1_arm.tar.gz - Copy the cloudflared directory to the bin location and set permissions.
sudo cp ./cloudflared /usr/local/bin
sudo chmod +x /usr/local/bin/cloudflared - Check the Cloudflared version. If the output from this command displays the version, Cloudflared is successfully installed.
cloudflared –v - Run the following command to get the login URL.
cloudflared login - Copy the URL from the Terminal and open the link in any web browser.
- Select the domain you had added to Cloudflare and click Authorize.
- After the authorization, run the following command to create a secure tunnel.
cloudflared tunnel create octoprint - The output will display a tunnel ID and the path to the JSON file that contains the credentials. Copy these to a text editor to save them.
- Use the following command to create a configuration file.
sudo nano ~/.cloudflared/config.yml - In the nano editor, paste the following code.
tunnel: b2efc6c1-2c75-45f8-b529d3eeReplace the details with your own tunnel UUID and the JSON file path. Press CTRL+X, followed by Y and the Enter key to save the changes.
credentials-file: /home/pi/.cloudflared/b2efc6cbde49d3ee.json
ingress:
- hostname: Domain.com
service: http://OctoPrintLocalIPAddress
- service: http_status:404 - Create a DNS entry in Cloudflare.
cloudflared tunnel route DNS octoprint octoprint.Domain.com - Finally, you can run the tunnel to access the OctoPrint from anywhere with secure SSL encryption.
cloudflared tunnel run octoprint - At this stage, if the OctoPrint server restarts, you will need to manually start the tunnel from the local network. However, you can enable auto-start of the Cloudflared service by following these steps.
- Move the Cloudflared configuration file to the /etc/cloudflared directory.
sudo mv /home/pi/.cloudflared/config.yml /etc/cloudflared/ - Install the Cloudflared service to enable auto-start when OctoPrint Server boots.
sudo cloudflared service installNow you don’t need to touch or access your OctoPrint server to start the Cloudflared tunnel service as it will automatically start. You can visit the configured hostname to access the printer.
Access, Monitor, and Print From Anywhere
You can now access, control, and monitor your 3D printer and 3D prints remotely from anywhere. All you need is a smartphone or PC with an internet connection to connect and retrieve the server. Make sure you use a strong password and enable two-factor authentication in SimplyPrint and OctoPrint to further secure the server.
Read More: Free Methods to Access and Manage 3D Printers Remotely – MakeUseOf


