Choosing the Right Microcontroller: ESP32 vs. Pico 2 vs. Arduino UNO R3
Arduino, Beginner, ESP, PiShop, Platforms, Raspberry Pi Pico, Resources, Skills, Tutorial arduino, ESP32, getting started, raspberry pi 0
Alright, get ready for a long. Short answer: pick the ESP32 or Pico 2W if you’re project needs to talk to a network, use a Raspberry Pi Pico 2 when you need processing power or I/O flexibility per rand, and the Arduino Uno R3 when you’re learning, teaching, or plugging into a 5V shield or sensor.
The point of microcontrollers is to be cheap and I’d say all options mentioned above satisfy that. They are also well documented and support massive communities posting every day with unique projects which is kinda what makes it hard to choose. The main differences show up in these 4 places: the pins, network capabilities, battery life and finally how much computing you get for your money. In this guide, we’ll walk you through each of these options to help you make the correct choice for the job.
The Choices
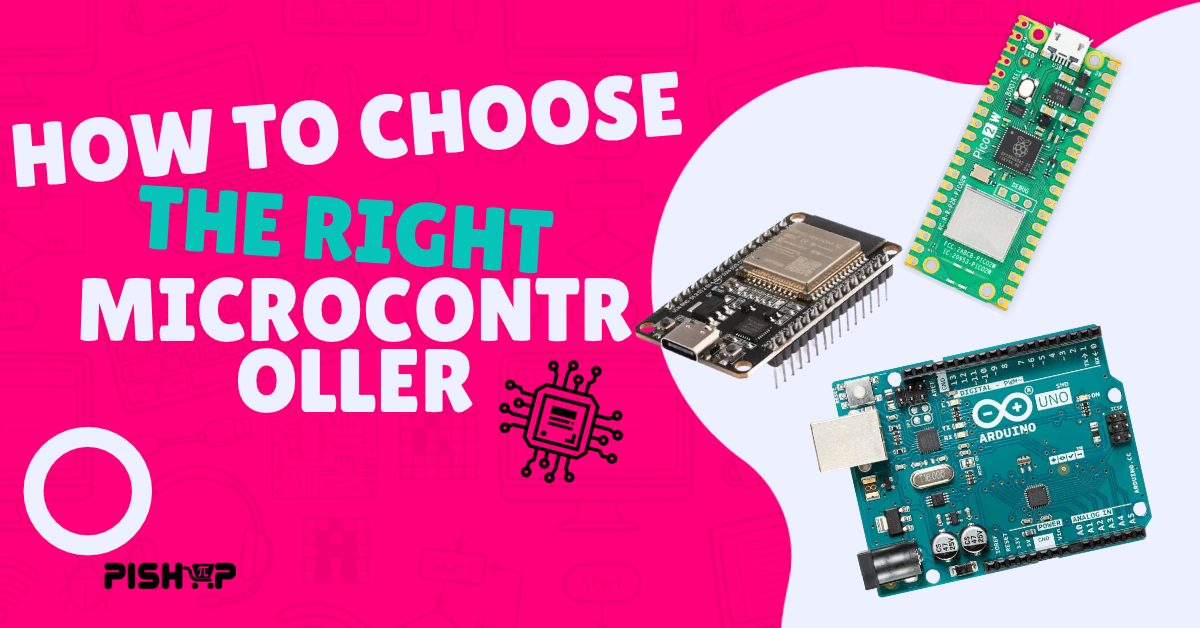
- Arduino UNO R3 is the classic. It runs an 8-bit ATmega328P at 16 MHz with 32 KB of flash and 2 KB of RAM. It works at 5V, takes shields, and has more tutorials behind it than any other board. Its strength is simplicity, not speed.
- Raspberry Pi Pico 2 is built on Raspberry Pi’s own RP2350 chip. It has two Arm Cortex-M33 cores (or two RISC-V Hazard3 cores, your choice) at 150 MHz, 520 KB of RAM and 4 MB of flash. The Pico 2 W adds Wi-Fi and Bluetooth on the same footprint and pinout.
- ESP32 is Espressif’s Wi-Fi and Bluetooth microcontroller. The classic ESP32 has two Xtensa LX6 cores at up to 240 MHz and 520 KB of RAM, with wireless built into the chip itself. It comes on dozens of boards from many makers, so features vary by board. Newer variants such as the ESP32-S3 add USB and AI-friendly instructions.
There’s also a fourth option worth knowing: the Arduino UNO R4 Minima keeps the UNO shape and 5V shield compatibility but moves to a 48 MHz Arm Cortex-M4 with 32 KB of RAM. If you love the UNO but need more headroom, look there.
Specs At A Glance
The Pico 2 and ESP32 are practically in the same class on paper; the UNO R3 is a generation behind on every compute number.
Arduino Uno R3
- Processor – ATmega329P, 8-bit, 1 core
- Clock Speed – 16 MHz
- RAM – 2KB
- Flash – 32 KB
- Logic Level – 5V
- Wifi – No
- Bluetooth – No
- Programming – Arduino IDE (C/C++)
- Input Voltage – 7 – 12V jack or 5V USB
Raspberry Pi Pico 2/2W
- Processor – RP2350, 32-bit, 2 x Cortex-M33 or 2 x RISC-V
- Clock Speed – 150MHz
- RAM – 520 KB
- Flash – 4 MB
- Logic Level – 3.3V
- Wifi – Pico 2W only (802.11n, 2.4GHz)
- Bluetooth – Pico 2W only (5.2)
- Programming – MicroPython, C/C++ SDK, Arduino
- Input Voltage – 1.8 – 5.5V
ESP32 (classic)
- Processor – 32-bit, 2 x Xtensa LX6
- Clock Speed – Up to 240 MHz
- RAM – 520 KB
- Flash – Typically 4 MB
- Logic Level – 3.3V
- Wifi – Yes (802.11 b/g/n, 2.4GHz)
- Bluetooth – Yes (4.2 Classic + BLE)
- Programming – Arduino, ESP-IDF, Micropython
- Input Voltage – 5V USB or 3.3V
Pinouts and I/O
The ESP32 has the most pins, the Pico 2 has the most flexible pins, and the UNO R3 has the friendliest pins.
Arduino Uno R3
- Usable GPIO – 20 (14 + 6 analog)
- Analog Inputs (ADC) – 6 x 10-bit
- PWM – 6 Pins
- UART / SPI / I2C – 1 / 1 / 1
- Extras – 5V I/O, Shield Headers
Raspberry Pi Pico 2/2W
- Usable GPIO – 26
- Analog Inputs (ADC) – 3 x 12-Bit on Header
- PWM – 24 Channels
- UART / SPI / I2C – 2 / 2 / 2
- Extras – 12 PIO State Machines, USB Host
ESP32 (classic)
- Usable GPIO – ~15 On Most Dev Boards
- Analog Inputs (ADC) – Up to 18 x 12-Bit
- PWM – 16 Channels, any output pin
- UART / SPI / I2C – 2 / 2 / 2
- UNO R3. The pin headers follow the shield layout, so motor drivers, relay boards and sensor shields plug straight in. Pins run at 5V, which suits older sensors, relays and LCDs without level shifters. The trade-off is a small pin count and a single hardware serial port, which the USB connection also uses.
- Pico 2. All 26 GPIO sit on 0.1″ headers in a breadboard-friendly DIP layout, with castellated edges for soldering onto your own PCB. The standout feature is PIO: 12 tiny programmable state machines that can bit-bang almost any protocol (WS2812 LEDs, VGA, extra UARTs, quadrature encoders) without touching the main cores. It’s the same pinout as the original Pico, so existing Pico add-ons fit.
- ESP32. You get lots of pins and a peripheral matrix that lets you route most functions to most pins. But not every pin is equal: GPIO 34–39 are input-only, several pins are boot “strapping” pins that can stop the board booting if pulled the wrong way, and the ADC2 channels stop working while Wi-Fi is on. Pin layouts also differ between board makers, so always check the pinout for your exact board.
Voltage warning: the Pico 2 and ESP32 are 3.3V boards. Connecting 5V sensor outputs to an ESP32 can damage it; use a level shifter or voltage divider. The RP2350 is more forgiving with 5V-tolerant inputs when powered, but it still only outputs 3.3V.
Power Draw
For battery projects, the chip’s sleep current matters less than the board around it, and that is where the UNO R3 loses.
These are typical figures, not guarantees. Real draw depends on clock speed, what’s connected and the board’s regulator, so measure your own build with a USB power meter or multimeter.
- UNO R3. The ATmega328P can sleep at microamps, but the UNO board keeps its USB chip, power LED and linear regulator running. Expect a 9V battery to last hours to a day or two, not months. For battery work, use a bare ATmega or a Pro Mini-style board instead.
- Pico 2. The RP2350 is noticeably more efficient than the original Pico’s RP2040, and the board’s wide 1.8–5.5V input means it can run straight from two AA cells or a single LiPo. Dormant mode with wake on a pin or timer makes it a good fit for sensors that sample occasionally.
- ESP32. Wi-Fi is the power hog: transmit spikes can brown out weak supplies, so use a decent USB source or a capacitor near the board. The flip side is excellent deep sleep: an ESP32 that wakes, sends a reading over Wi-Fi and sleeps again can last months on a battery, provided the dev board’s USB chip and regulator don’t waste power. Pick a board designed for low power if battery life matters.
Which Should You Choose?
Start with wireless: if you need it, it’s the ESP32 or Pico 2 W; if you don’t, it’s the UNO R3 or Pico 2.
- Choose the ESP32 for smart-home sensors, Wi-Fi dashboards, MQTT nodes, Bluetooth audio or anything you’ll run through ESPHome or Home Assistant. It’s the cheapest connected board here and has the deepest library support.
- Choose the Pico 2 W for connected projects where you also want precise timing, lots of PWM or custom protocols through PIO, or where you already own Pico add-ons. MicroPython support is excellent.
- Choose the Pico 2 for robotics, LED art, data logging, USB devices, retro-computing and anything that needs speed and I/O without a network. It’s also a great second board after an UNO.
- Choose the Arduino UNO R3 for a first project, a classroom, or when you’re plugging in 5V shields and older sensors. If you want the same shape with more power, step up to the UNO R4 Minima.
Conclusion
There isn’t really a perfectl choice, each microntroller has it’s own purpose and use. The ESP32 wins on connectivity per rand, the Pico 2 wins on compute and I/O flexibility, and the UNO R3 wins on ease and 5V compatibility. At these prices, many makers keep one of each on the bench.
All three, plus the Pico 2 W and UNO R4 Minima, are available from PiShop alongside the cables, headers, breadboards and sensors you’ll need to get started. Browse the boards range or ask our team which fits your build. Have you used any of these boards before? What are your experiences with them and what project did you use them for?
Source
- Raspberry Pi Pico 2 W, PiShop
- Arduino Official Range, PiShop
- ESP range, PiShop
- Pico microcontroller boards, Raspberry Pi Documentation
- Arduino UNO Rev3 SMD product page
Power figures are typical board-level values from manufacturer data and common measurements, not PiShop tests.