Classroom-Ready IoT: A Step-by-Step Guide to the Smart Garden PAT
Beginner, Getting Started, Home Automation, Micro:bit, PiShop, Platforms, Projects, Skills beginner, getting started, iot, micro:bit, Smart garden, Tech 0
The seasonal panic to get Technology Mini-PATs is a regular part of our annual routine and those static cardboard models just don’t really do it any more, but don’t worry we’ve got your next project that has some wow factor and can actually be useful at home.
So, what even is this project? We’ll be building a smart garden, a Micro:bit with a soil moisture sensor and pump. The soil moisture sensor detects how wet the soil is, sends a signal to the Micro:bit which then activates the pump to automatically water any the plant that it’s with! The intention of this project is to show how by combining a Micro:bit with a clever expansion board could open up your projects to plenty more IoT possibilities.
The Breakdown: Input, Process, and Output
Before diving into the wires, components and soil of the project, we’ll need a proper layout for this project:
- Input Device (Where the data is being generated): The Capacitive Soil Moisture Sensor
- The Process (Where the data is being sorted and a decision is being made): The BBC Micro:bit V2
- Output Device (The physical Action determined by the process): The Micro Submersible Pump
Now that we’ve got the basic process down, we can look at the components that we’ll need for this project.
The Hardware Checklist
To build this project, you’ll need:
1 x BBC micro:bit V2 Essentials Kit – The core microcontroller.
1 x Kitronik Environmental Control Board – The secret weapon that eliminates messy wiring.
1 x Capacitive Soil Moisture Sensor – Corrosion-resistant and perfect for damp soil.
1 x 3V–5V Mini Submersible Water Pump & Tubing – To move the water.
A small potted plant and a container of water (like a recycled plastic cup).
or
Why the Kitronik board is a classroom game-changer
Traditionally, connecting a water pump to a micro:bit requires an external 5V relay module and complex battery wiring because the micro:bit cannot output enough current to drive a motor directly. The Kitronik Environmental Control Board solves this elegantly. It features built-in high-power motor drivers and an integrated battery slot, allowing you to plug everything into a single, neat board. No messy breadboards, no fried micro:bits!
Hardware Setup
- Slot the Micro:bit into the Kitronik Board
- Connect the the Soil Moisture sensor the the analog input pin, ground pin, and 3V pin. You’ll see I actually mistakenly connected the data pin on the Soil Moisture Sensor to Pin 0 on the Kitronik Board instead of Pin 1 Which will be in the upcoming code blocks.
- Connect the pump wires to the terminals on the side of the board, remember that red goes to positive and black to negative/ground
The Coding Logic
Step 1: Add the Kitronik Extension
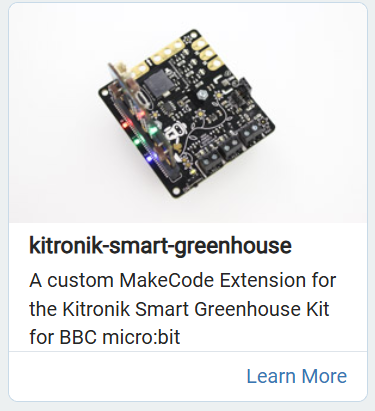
You can find the custom blocks that I am using in the code by clicking on Extensions in your makecode project and searching for Greenhouse. Then click on the kitronik-smart-greenhouse extension to add it.
Step 2: The Code
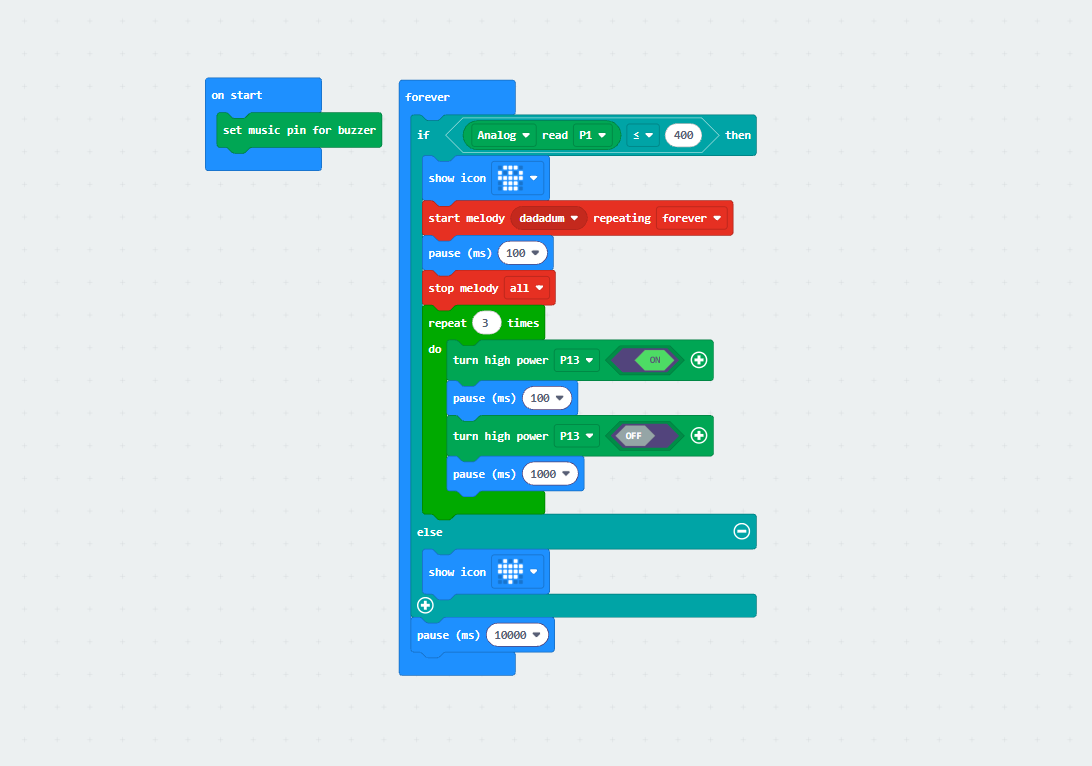
The logic follows a simple loop:
FOREVER:
Read the analog value from the moisture sensor.
IF the moisture value is LESS THAN your dry threshold (e.g., 400):
Display a Sad Face (I have it as the skull icon) on the Micro:bit LED matrix.
Turn High-Power Output Pin 13 ON (Pump starts watering).
ELSE (The soil is perfectly wet):
Display a Happy Face (I have it as the heart icon) on the Micro:bit LED matrix.
Turn High-Power Output Pin 14 OFF (Pump stops).
PAUSE for 10000ms (Wait 10 seconds before checking the soil again).
How to Extend The Project
Here’s some ideas for how to can customize the project a little bit or make it run smoother:
- Modify the code so that instead of just turning on the pump it turns it on and off 3 times so as not to flood the pot nevermind the classroom as show in the code.
- Use the built-in piezo buzzer on the Kitronik board for audio indicators of when the soil is dry.
Conclusion
And there you have it! What starts as a mandatory school assignment turns into a fully functioning piece of smart tech that can actually keep your household plants alive.
By stepping into physical computing with the micro:bit and the Kitronik board, you get to see exactly how real-world agricultural IoT works. Best of all, you don’t need to be an electrical engineer to get it right. The Kitronik board handles the heavy lifting, keeping your workspace clean and your micro:bit perfectly safe from short circuits.
Whether you’re a teacher looking to inspire your class, a student aiming for an easy A+, or a weekend maker looking to automate your greenhouse, this setup is the perfect launchpad.
Ready to build your own? Grab your micro:bit, soil sensor, and the Kitronik board directly from the PiShop Africa Online Store. Happy making!