
Host Your Own Raspberry Pi Audiobook Library With Audiobookshelf
Reading expands the mind, but sometimes, pulling a 600-page tome from your pocket just isn’t practical. You can’t indulge in classic prose when driving a car, for example. This is where audiobooks come in, giving you the benefit of a narrated literary experience without requiring that you take your eyes off the road. With audiobooks, you can consume fantastic literature while driving, doing the dishes or even while you’re working. While there are numerous audiobook subscription services available, it’s far more satisfying to create and host your own library on a Raspberry Pi.
What Is Audiobookshelf?
Audiobookshelf is a self-hosted audiobook and podcast server. This means that you can deploy it yourself on a VPS (virtual private server) or on your own hardware at home and access it through the internet, streaming and downloading stories through a phone or a dedicated app.
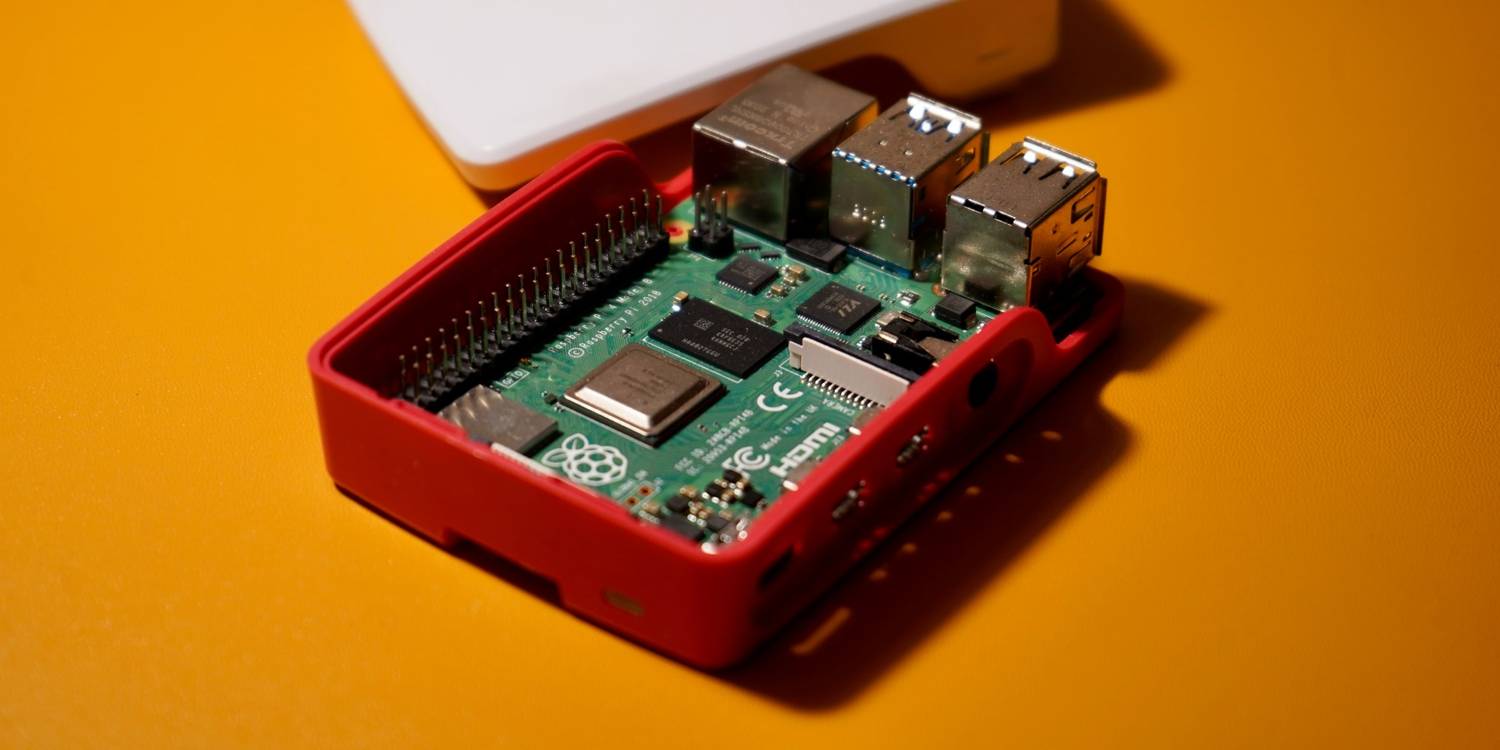
A Raspberry Pi is ideal for this project. You will need to know its local IP address, and will also need a static IP address, and a domain name.
How to Install Audiobookshelf on Raspberry Pi
Once you have installed an operating system on your Raspberry Pi, connect to it using SSH (Secure Shell).
Replace username and local.pi.ip.address with your own Raspberry Pi’s details. Now take the following steps to install Aurdiobookshelf.
- Update and upgrade any installed packages:
sudo apt update
sudo apt upgrade - Install the Apache2 reverse proxy so that you can access Audiobookshelf from outside your home:
sudo apt install apache2 - And certbot, which you will later use to generate security keys and certificates to keep your connection safe:
sudo add-apt-repository ppa:certbot/certbot
sudo apt update
sudo apt-get install python3-certbot-apache - Docker is a means by which developers can make building, running, and updating software packages easy for the end user:
sudo apt install docker.io - Add your user to the docker group:
sudo usermod -aG docker your_user_name - Start and enable Docker with:
sudo systemctl start docker
sudo systemctl enable docker - Docker-compose is a tool makes managing Docker containers simpler:
sudo apt install docker-compose - From your home directory, create a new directory called audiobookshelf, then cd into it, and create four more directories:
cd audiobookshelf
mkdir audiobooks
mkdir podcasts
mkdir config
mkdir metadata - Return to your home directory and create a new docker-compose file:
cd ~And paste the following into it:
nano docker-compose.ymlversion: '3.5'The only parts of this you will need to change are the paths to the directories. Save and exit nano with Ctrl + O then Ctrl + X.
services:
audiobookshelf:
container_name: audiobookshelf
image: ghcr.io/advplyr/audiobookshelf:latest
environment:
- AUDIOBOOKSHELF_UID=99
- AUDIOBOOKSHELF_GID=100
ports:
- 13378:80
volumes:
- /home/your-user-name/audiobookshelf/audiobooks:/audiobooks
- /home/your-user-name/audiobookshelf/podcasts:/podcasts
- /home/your-user-name/audiobookshelf/config:/config
- /home/your-user-name/audiobookshelf/metadata:/metadata - The command:
docker-compose pullwill pull all the necessary images onto your Pi, and:docker-compose up -dwill start the containers. Audiobookshelf is now running.
Setting Up Audiobookshelf From Your Home Network
Audiobookshelf is now accessible from within your home network but not from the wider internet. It is best practice to perform initial setup before connecting to the internet and obtaining SSL certs, as bad actors watch certificate logs to see when new sites go online, and they may be able to take control during this period.
Access the Audiobookshelf front end by typing your.pi.ip.address:13378 into any browser. You will be prompted to set up a root user account and password.
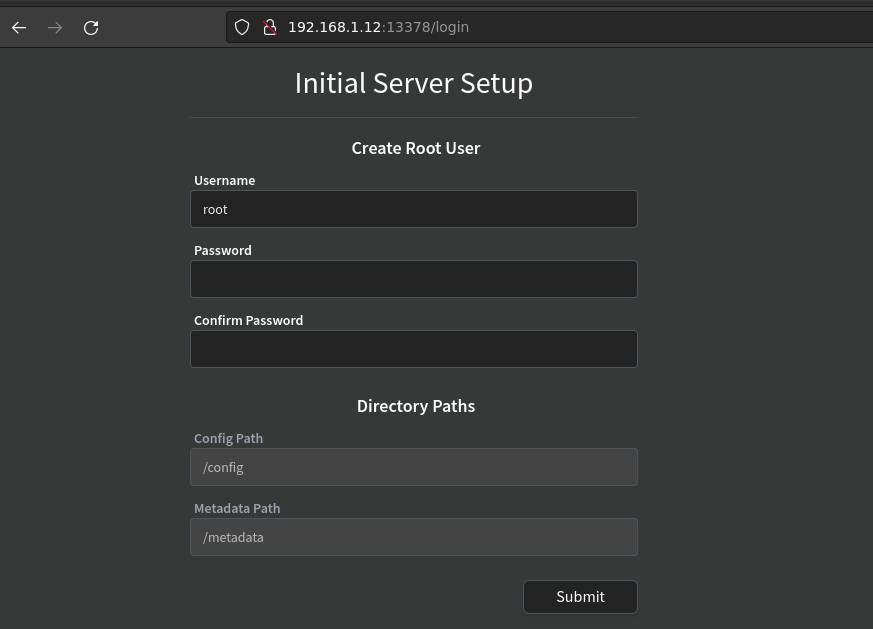
Make sure that you choose a strong password which can’t be easily guessed. You will then be prompted to log in with the credentials you just created.
At this point, Audiobookshelf will prompt you to Add your First Library, and will ask you to select either books or podcasts, give a name to the library, and browse for the library. Because Audiobookshelf only has access to the directories specified in your docker-compose.yml, the location for this is /audiobooks. Select this, then click Create New Library.
Audiobookshelf does not have any audiobooks because at this point you haven’t added any. On the computer where your audiobooks are stored, use PuTTY or the terminal to transfer your library to the correct location on the Raspberry Pi.
scp -r /path/to/your/audiobook/directory/* [email protected]:/home/your-user-name/audiobookshelf/audiobooks/
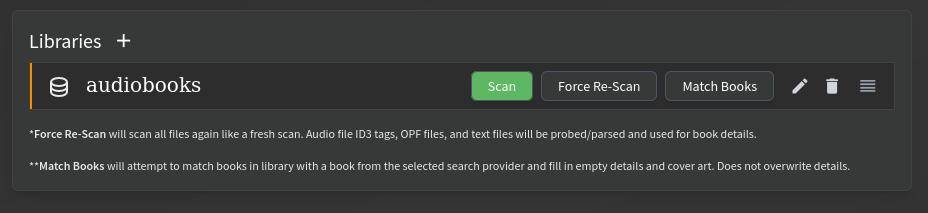
Depending on the size of your collection, this process may take several hours. Once it has completed and you are returned to the prompt, head back over to Audiobookshelf in your browser and hit the green Scan button.
Audiobookshelf will now attempt to identify your audiobooks using providers including Apple, Audible, and Google to determine chapter markers, author, narrator, synopsis, and whether the books are part of a series. When this has finished, your library will be populated, categorized and searchable.
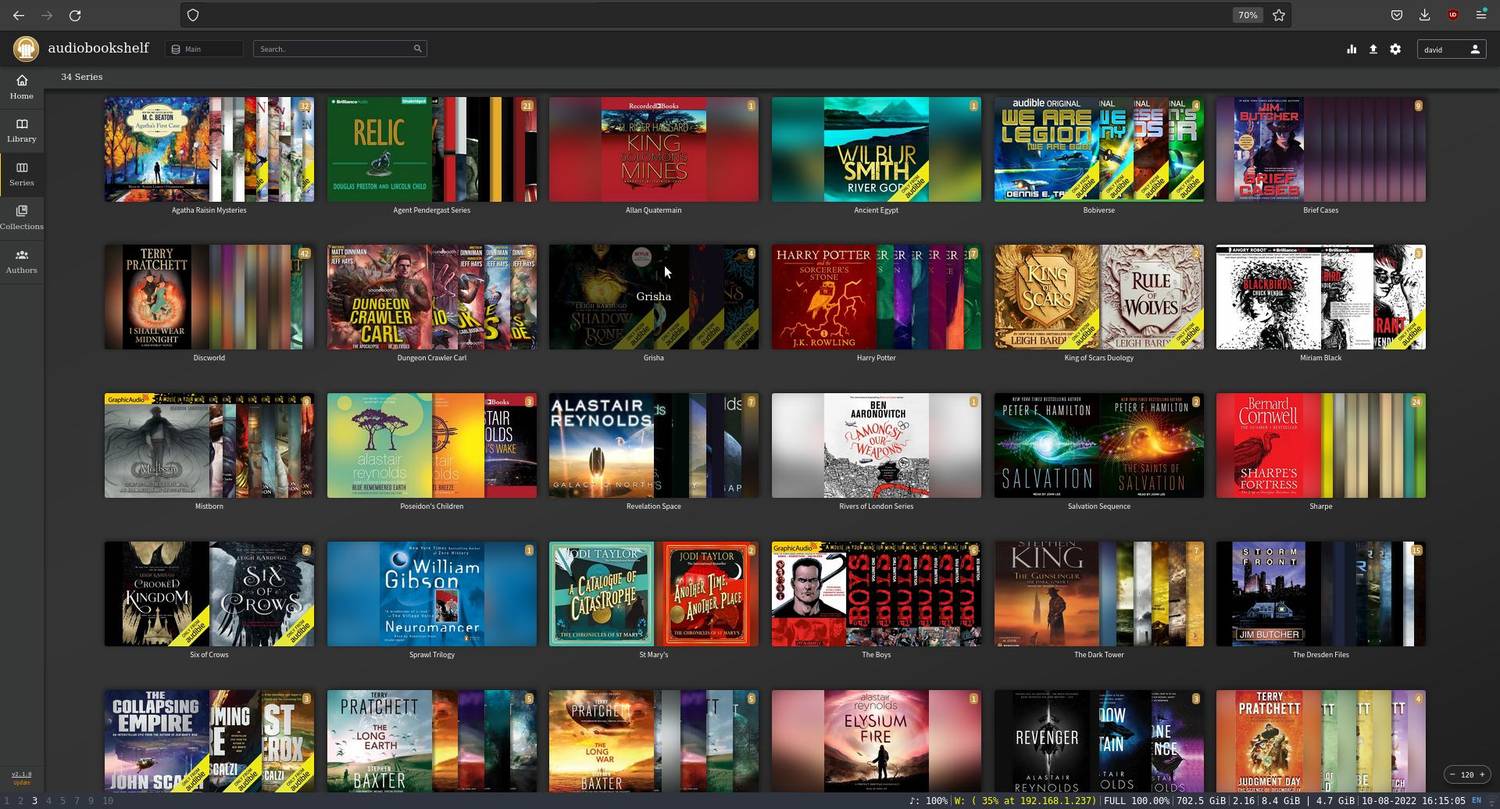
You will be able to navigate easily between screens using buttons arrayed vertically along the left edge of the screen. Home is divided into sections showing what you are currently reading, the next book in the series, recently added audiobooks, and recently added series. At the very bottom, there are images of authors and narrators. You can click on these to see a potted biography.
Other screens include Library, which shows individual covers of every single book in your audiobooks directory; series; collections; and authors. All of these will show exactly what you expect them to do.
To start listening to an audiobook, click on the cover and press Play. Audiobookshelf will remember your position for you.
Accessing Audiobookshelf From Outside Your Home
Listening to a good audiobook while sitting in an armchair in front of the fireplace at home is a pleasant experience, but you will likely want to access your narratives from outside the home. To do this you will need to direct requests to your domain name to port 13378 on your Raspberry Pi.
- In the terminal or SSH client:
cd /etc/apache2/sites-available - Create a new file with nano:
sudo nano audiobookshelf.conf - Enter the following:
<VirtualHost *:80> ServerName your-domain-name.tld ProxyPreserveHost On ProxyPass / http://your.local.pi.ip.address:13378/ RewriteEngine on RewriteCond %{HTTP:Upgrade} websocket [NC] RewriteCond %{HTTP:Connection} upgrade [NC] RewriteRule ^/?(.*) "ws://your.local.pi.ip.address:13378/$1" [P,L] </VirtualHost>You will need to replace your.local.pi.ip.address with your Pi’s actual local IP address, and the value for ServerName should be the domain name you want to use. Save and exit nano with Ctrl + O then Ctrl +X. - Enable your new conf file with:
sudo a2ensite audiobookshelf.conf - Restart Apache2:
sudo service apache2 restart - Your Audiobookshelf instance is now accessible over the internet through an HTTP connection. This is not secure, so use certbot to obtain certificates and keys from Let’s Encrypt:
sudo certbot - Select your domain name from a list and choose redirect when asked.
- You will need to restart Apache one more time for the changes to take effect.
sudo service apache2 restartAny connection attempts made over HTTP will automatically be upgraded to HTTPS, making your connection more secure.
Where Can You Find Books for Audiobookshelf?
Audiobookshelf can stream all audio formats on the fly including the popular MP3, M4A, and M4B formats. You can find DRM-free audiobooks at Downpour and LibriVox. A careful web search will reveal more locations and independent retailers.
Read More: Host Your Own Raspberry Pi Audiobook Library With Audiobookshelf – MakeUseOf


