
Your Raspberry Pi Just Got a Massive Graphics Upgrade (The Streaming Way) | Moonlight Tutorial
Beginner, Home Automation, PiShop, Platforms, Projects, Raspberry Pi, Skills beginner, home management, raspberry pi, sensors, streaming, Tech 0
With the gaming industry trending towards Hand-held consoles and cloud streaming services we feel its only fitting to introduce you to some software to turn your Raspberry Pi into the perfect gaming streaming hub. Whether you just want to play games in the lounge or create a handheld Raspberry Pi based console here’s your solution!
In this weeks tutorial we’ll be showing you how to install either Moonlight-qt to start your interactive streaming experience.
What is Moonlight-qt and Steam link?
Moonlight is a fantastic self-hosted service for streaming games from a powerful gaming device to something weaker like a Raspberry Pi. Moonlight will be installed on the Raspberry Pi while Sunshine working as the host will be installed on your pc or any other console you might be streaming from.
This software allows you to stream your games from a device that for example might be in a completely different room to your Raspberry Pi connected to the living room TV. Please keep in mind that streaming services like this are always better with a direct ethernet connection otherwise you might experience some latency during gameplay.
Installing Moonlight and Sunshine
What you'll need:
- Raspberry Pi 5
- 32GB SD Card
- Keyboard and Mouse
- Power Supply
- An ethernet or wifi connection
Or
Step-by-step guide
1. We’ll start with the usual commands for prepping your Raspberry Pi by updating packages.
					sudo apt update
sudo apt upgrade -y
2. The first package, “curl“, is what we will use to grab and run the script that sets up the Moonlight package repository.
The second package, “pulseaudio“, will allow audio to work properly between Moonlight and the Raspberry Pi.
sudo apt install curl pulseaudio
You should then enable pulseaudio’s service to autostart it on boot.
sudo systemctl --global enable pulseaudio
3. Now we can get started onto the fun part! We can get Moonlight package repository using the curl package mentioned above by using the following command:
curl -1sLf 'https://dl.cloudsmith.io/public/moonlight-game-streaming/moonlight-qt/setup.deb.sh' | distro=raspbian codename=$(lsb_release -cs) sudo -E bash
4. You can install Moonlight onto your Raspberry Pi now!
sudo apt install moonlight-qt
You’ve done it! You should be able to find Moonlight in the Gaming section of your Raspberry Pi’s Start Menu. All you need is install Sunshine on whatever device you’d like to host on.
You can find the different devices here and the Windows specific installers here.
How to connect your Raspberry Pi to your Host
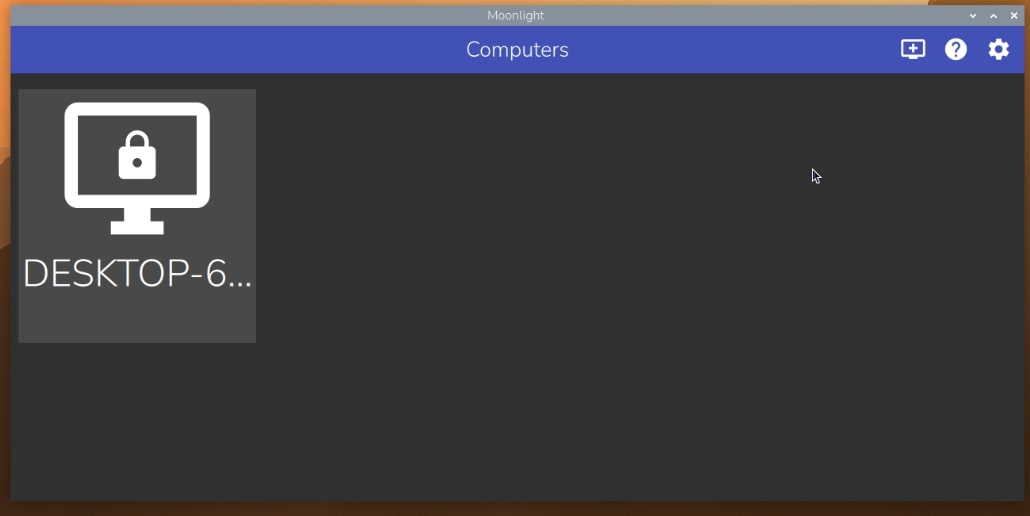
1. If you have Sunshine setup on your Host device it should come up while Moonlight scans the network. You can also use an IP Adress to direct connect to your device by clicking on the” +” Icon at the top right.
Click on your device and a window with a pin should pop.
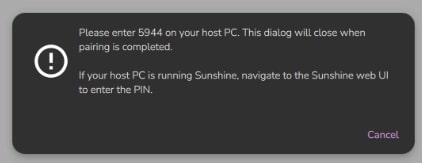
2. On the Sunshine web interface click on on the pin button at the top. Use the pin displayed on Moonlight as well as your Raspberry Pi’s username.
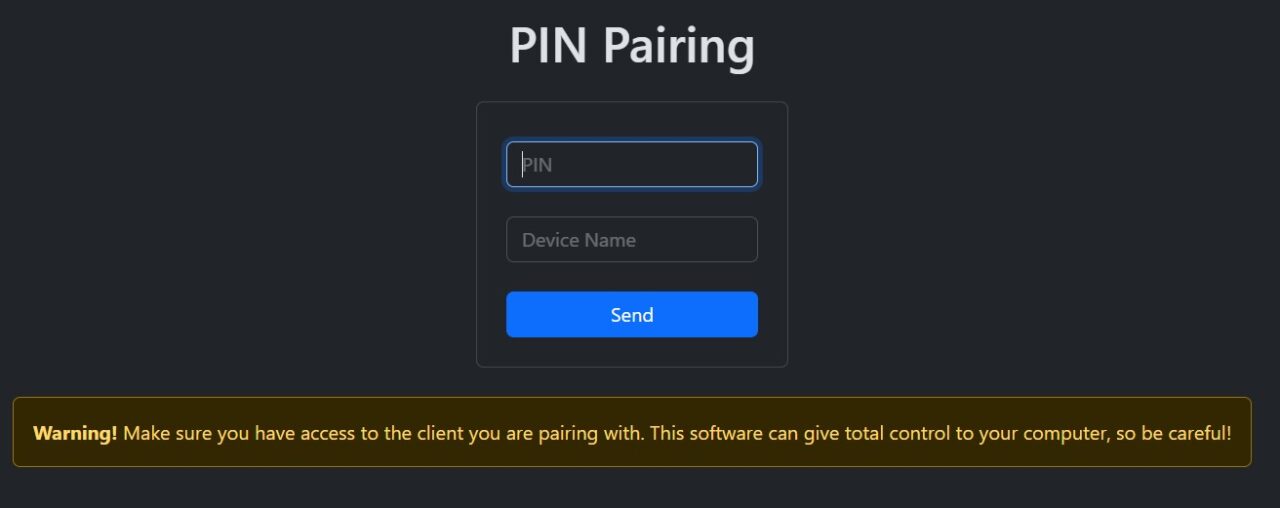
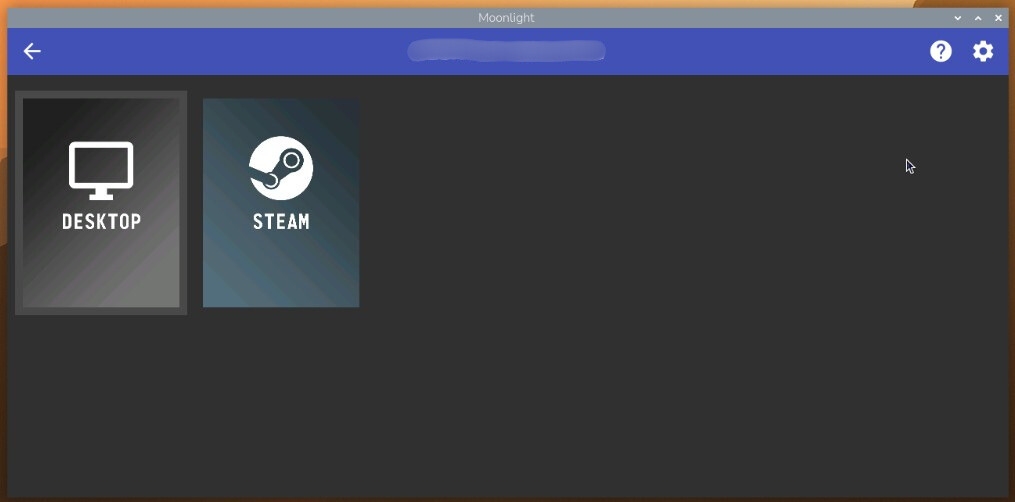
After clicking send you should get a confirmation notification and on Moonlight be able to click on the device to see your different streaming options!
Conclusion
Congratulations on creating your new streaming channel/service! You should now be able to connect in whichever room you want. Have you setup Moonlight before or have your own handheld console project that you’d like to show then please leave a comment below! We love reading your stories and comments.
If you found this tutorial interesting or insightful, we have a handful of other projects that you can check out on our blog. Don’t forget to check out our socials for important announcements and posts.


