")
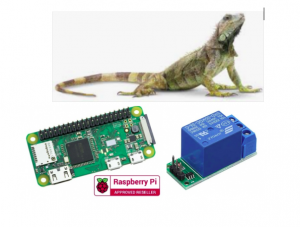
Home Automation – Relays, Raspberry Pi Zero and Temperature Sensors
The next project that has caught our attention is Home Automation.
We will start out small, by automating my reptile cages at home. I found that not only do I forget to turn my lights on and off, it seems as if my animals are getting a little too hot especially in the summer months.
The plan for now is to add a timer to my UV lights so they will turn on and off at certain times and add a temperature sensor to my heating lamps to switch them on and off at certain temperatures. What I will need to know is:
- We do need separate relays for separate lights and where can I combine the lights to a single relay?
- Same with the temperature sensors: do I need to add a sensor to each cage?
- At what temperatures does each cage need to run?
- And lastly, do I need to monitor all the animals.
To start my project off with I will just get one cage to operate correctly and then start adding as needed. Thus postponing most of the above mentioned questions.
Questions still needed in this instance would be:
- At what temperature should my selected cage operate at?
- And probably the most interesting would be… why a Raspberry Pi Zero and not something like a SonOff?
The answer to the last question is the easiest to answer. I do not have WiFi capabilities in my home which would mean that most of the SonOff things would not work, so this would be over kill. Besides, since I would like to create something myself and know I create it in python, I probably would never need to worry about it again… Unless my Pi blows up, which with my luck is completely possible.
So here we go!
I decided to use the GPIOZero Library since it is the easiest way to control your GPIO pins.
For the relays I use GPIOZero-LED. Why? Simple, all that the LED module does, is set a pin HIGH or LOW, just easier… Now, on this step, we often get confusion, since you need to see if in your code “ON” is what you actually want the relay to do, or is your wiring in such a way that you actually want OFF=relay.on().
The DS18B20 Temp sensors code you can find here.
What I used:
- Raspberry Pi Zero kit (Setup)
- Relay Module
- DS18B20 Temperature sensor
- 4.7k Resistor
- Connection wires
Setting up
We will assume that you have your raspberry pi setup and ready to go. If you need help with this visit our blog
Connection:
I simply connected the temperature sensor as shown by the Adafruit tutorial.

For the relay
Relay Pi
VCC 5V
GND GND
IN1 GPIO14

Software:
Lets see what code we need
First we need to read the temperature:
import os
import glob
import time

os.system('modprobe w1-gpio')
os.system('modprobe w1-therm')

base_dir = '/sys/bus/w1/devices/'
device_folder = glob.glob(base_dir + '28*')[0]
device_file = device_folder + '/w1_slave'

def read_temp_raw():
    f = open(device_file, 'r')
    lines = f.readlines()
    f.close()
    return lines

def read_temp():
    lines = read_temp_raw()
    while lines[0].strip()[-3:] != 'YES':
         time.sleep(0.2)
         lines = read_temp_raw()
         equals_pos = lines[1].find('t=')

         if equals_pos != -1:
             temp_string = lines[1][equals_pos+2:]
             temp_c = float(temp_string) / 1000.0
             temp_f = temp_c * 9.0 / 5.0 + 32.0
            return temp_c, temp_f
Now we need to respond to the temperature:
In your imports section add the LED:
from gpiozero import LED
Now initiate the relay:
relay = LED(14)
Then add your function:
def trigger_relay():
    temp = read_temp()
    if temp <= 28.0 and >= 36.0:     # We would ideally like the temp range to stay between 28 and 36 degrees for this cage
        relay.on()
    else:
        relay.off()
And that’s it! Home automation should not be such a scary disaster, it could be quite simple.
Resources:
https://learn.adafruit.com/adafruits-raspberry-pi-lesson-11-ds18b20-temperature-sensing
https://gpiozero.readthedocs.io/en/stable/


