
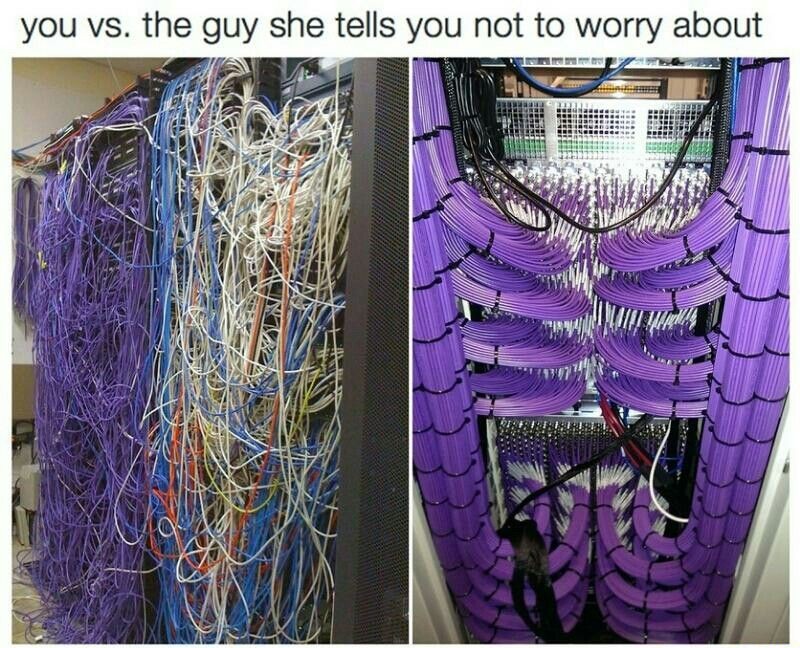
The Importance of Cable Management
Let’s start this article off with some self-introspection and self-realization, stand up for a second and have a look behind places like your desk and computer, your lounge TV setup or one of your Raspberry Pi projects. What did you see? It’s more than just an eyesore, safety hazards, frustration and a productivity drain… Cable Management. I first realized how bad my cable management was getting mid-winter after tripping over an ethernet cable and finding a lack of motivation to sort through it. Now that it’s spring, it’s about time we clean our “cable spaghetti” that’s been cooking for a while. Why is it necessary though? A well-organized setup helps with protecting valuable electronics, saving time through organization and maybe even helps make life just a bit more comfy.
A Step-by-Step Guide to taming a beast
If the task is a bit daunting, don’t worry I’ll walk you through it. As makers yourselves, I’m sure you know that any good project starts with a plan! Follow these steps for a guaranteed success story.
Step 1: The Great Unplug & Declutter
Before reorganizing anything, you need to assess what you’ll be working with.
- Unplug Everything. Make sure everything from your wall chargers to your UPS to any displays are unplugged. We’ll be starting with a clean slate. As you unplug appliances, make sure to inspect the cable to check for any wear & tear like exposed wire or any damaged plugs. Setting this aside will definitely help you dodge any future hazards.
- Take Inventory. Taking note of and laying out every cable will surely surprise you with a few mystery cables that you haven’t seen or used in a while. If it doesn’t have a clear purpose or a device its connected to then its time to move it into your spare cables box. Be Ruthless! The less cables the better.
Step 2: Plan Your Layout
We now know what we do and don’t want/have, it’s time to start the planning.
- Consider your outlets. The goal for this step is to keep the distances that cables need to travel to a minimum by finding the nearest source of power to the device that you’ll be using. Use rules like if there’s only on device in the area then use an outlet, if you have a cluster of devices, try using a power strip or a surge protector.
- Visualize the path. Map out the area by figuring out where to run your cables. Are they running behind a desk? ‘Along the floor or along a wall? Mapping things out in advance will help with figuring out what tools you need later on.
Step 3: Organize and Bundle
Finally we can start bringing order to the chaos.
- Group your cables. Don’t recreate the mess by throwing everything together. Organize the cables by function such as power cords, data cables, audio cables, etc. This is a professional-grade strategy which will make future changes a breeze!
- Label Everything. Using a label maker or even just a piece of tape with a pen, add labels to each of every cables ends with what it is being used for. Instead of having to trace the cable in either direction you can just read the labels.
- Bundle them up. Once your groups have been made, bundle them using Velcro straps (more reusable than zip ties). For a more clean look, you can use a braided cable sleeve that can house multiple cables in a single sheath.
Essential Cable Management Products
You don’t need a professional organizer’s toolbox to achieve a clean setup. A few key items can make a world of difference. Here’s a rundown of essential cable management products, from budget-friendly finds to professional-grade solutions.
You won’t need a professional toolbox of organizing goodies for a job like this. Selecting just a few key items is perfect for the job at hand. The following lists are essential cable management products.
Under-Desk Solutions
- Cable Trays or Baskets: These are your best friend for hiding power strips and the bulk of your cords. A tray that attaches to the underside of your desk keeps everything off the floor and out of sight.
- Adhesive Cable Clips or Holders: Perfect for securing a single cable along the edge or underside of a desk. Use them to keep your phone charger from sliding off the table or to guide a monitor cable neatly to its port.
Hiding & Routing
- Cable Management Boxes: These are simple, sleek boxes with openings on the sides. They’re a fantastic way to hide a messy power strip and all the cables plugged into it, instantly cleaning up the area around your entertainment center or desk.
- Cable Raceways or Channels: If you need to run a cable along a wall or baseboard, these adhesive channels hide the cord completely, giving you a smooth, clean look.
Bundling & Organizing
- Velcro Ties: These are a must-have. Unlike zip ties, they are reusable and incredibly easy to adjust or remove when you need to add or change a cable.
- Cable Sleeves or “Socks”: For a truly professional look, use a braided sleeve to bundle multiple cables into a single, clean tube. It’s perfect for the cables behind a TV or computer monitor, turning a jumble into a tidy column.
DIY & Budget-Friendly Hacks
- Binder Clips: A small binder clip attached to the edge of your desk can hold a charging cable perfectly, preventing it from falling to the floor.
- Toilet Paper or Paper Towel Rolls: These are great for storing coiled-up cables in a drawer. Just label the outside of the tube, and you’ll always know what’s inside.
If you have a 3D printer or laser cutter, it becomes even more simple to find management solutions check the following links to help:
Specific Use Cases
The principles o, but the execution often depends on the specific space. Here’s how you can apply these techniques to the most common problem areas in your home or office.
The rules and principles described in this article are consistent but the steps and use cases can change depending on the specific space. The following tips and tricks are some ways to apply the earlier techniques to different environments.
Home Office Desk
This is often ground zero for cable clutter. A typical desk setup includes a computer, monitor(s), keyboard, mouse, speakers, and various chargers.
- Under-Desk Cable Tray: Start by installing a cable tray or basket directly under your desk. This is the perfect spot for your power strip. Plug all your devices into the strip, and then tuck the excess cords into the tray.
- Cable Clips & Grommets: Use adhesive cable clips to guide individual cables—like your monitor’s power cord or a USB cable for a webcam—along the underside of the desk and up to the device. If your desk has a pre-drilled hole (a grommet), utilize it to feed cords directly from the tray to your desktop.
- Keep Charging Cables Accessible: Use a small binder clip or adhesive cable holder to secure your phone or laptop charging cable at the front edge of your desk, so it’s always within arm’s reach but never on the floor.
Entertainment Center
The area behind your TV can quickly become a tangled jungle of HDMI, power, and audio cables.
- Cable Management Box: Place a stylish cable management box on the floor behind your TV stand. Feed your power strip and all the corresponding power cords into the box. This single step will instantly hide the most unsightly part of the mess.
- Cable Sleeves: For the cables that run from your TV down to your media console (e.g., HDMI, power), use a single braided cable sleeve. This bundles them into one cohesive unit, making it much easier to manage and far more visually appealing than a loose bundle of wires.
- Wall-Mounted TV Solutions: If your TV is mounted on the wall, consider using a paintable cable raceway to conceal the wires running from the TV down to an outlet or media cabinet. For a truly seamless look, you can even run the cables behind the drywall, though this requires a bit more effort.
Charging Station
With all our devices, a dedicated charging station can become a chaotic mess of cables.
- Consolidate with a Charging Hub: Instead of using multiple wall outlets, invest in a multi-port USB charging hub. This allows you to charge several devices—like your phone, tablet, and smart watch—from a single power source.
- Use Short Cables: Swap out long, standard-length charging cables for shorter, retractable ones. This minimizes the amount of slack and makes it easier to keep the charging area tidy.
- Designate a Spot: Use a small box, a dedicated charging stand, or even a repurposed bread box to create a “home” for all your charging devices and their corresponding cables. This ensures everything has a place and stays organized.
Conclusion
Coregulations! We’ve managed to tame what ever that mess was going to become, leaving us with a clean and well organized space. Just remember that a well-managed setup isn’t a one-and-done project. Make sure to practice the following if you wanna keep it they way it is right now:
- Make it a Habit: Once or twice a year, take a few minutes to check your cables. Are there any new devices? Have any wires come loose? A quick check-in prevents a small mess from becoming a full-blown rat’s nest again.
- Give Yourself Room to Grow: When setting up your cable management, leave a little slack. This makes it easy to add or remove a new device without having to completely redo your setup.
- Embrace Wireless: When it makes sense, consider going wireless. A wireless mouse or keyboard, Bluetooth speakers, and Wi-Fi-enabled printers all help reduce the number of cords you have to manage.
If you enjoyed the article, make sure to check out the rest of our blog as well as our socials, where we post about upcoming events and any specials! If you’ve got any other tips for keeping your cables neat and tidy leave them in the comments below!


