Set-up and Run BNO055 9-axis Sensor
The BNO055 smart sensor is a System in Package solution that integrates a 14-bit accelerometer, an accurate close-loop 16-bit gyroscope. As well as a geomagnetic sensor and a 32-bit micro controller. In other words this smart sensor is significantly smaller than comparable solutions.
What you will need
- A fully setup Raspberry Pi
- (If you do not know how to do this please refer to our setup guide for help)
- A BNO055 sensor
- Some jumper wires
Installation packages
sudo apt-get update && sudo apt-get -y upgrade && sudo apt-get -y dist-upgrade
sudo apt-get -y autoremove --purge && sudo apt-get -y autoclean
sudo reboot
Setup I2C on the Raspberry Pi (I used the GUI)
Applications menu -> Preferences -> Raspberry Pi Configuration -> Interfaces -> I2C
Install i2c tools
sudo apt-get install -y i2c-tools
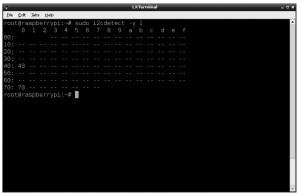
Get sensor address
i2cdetect -y 1

Adafruit library dependencies install
It’s easy to use the BNO055 sensor with Python and CircuitPython. Using the Adafruit CircuitPython BNO055 library. This library allows you to easily write Python code that reads the acceleration and orientation of the sensor.
You can use this sensor with any CircuitPython micro controller board or with a computer that has GPIO and Python. Thanks to Adafruit_Blinka, The CircuitPython-for-Python compatibility library.
First make sure you are running the latest version of Adafruit CircuitPython. You’ll need to install the Adafruit CircuitPython BNO055 library as well.
sudo pip3 install adafruit-circuitpython-bno055
If your default Python is version 3 you may need to run ‘pip’ instead. Just make sure you aren’t trying to use CircuitPython on Python 2.x, it isn’t supported!
Wiring
Here’s the Raspberry Pi wired with I2C:
 | Pi 3V3 to sensor VIN (red wire for STEMMA QT) Pi GND to sensor GND (black wire for STEMMA QT) Pi SCL to sensor SCL (yellow wire for STEMMA QT) Pi SDA to sensor SDA (blue wire for STEMMA QT) |
Using the library
Older versions of the Raspberry Pi firmware do not have I2C clock stretching support so they don’t work well with the BNO. Please ensure your firmware is updated to the latest version before continuing and slow down the I2C as explained here
I2C Initialization
import board
import busio
import adafruit_bno055
i2c = busio.I2C(board.SCL, board.SDA)
sensor = adafruit_bno055.BNO055_I2C(i2c)
Now you’re ready to read values from the sensor using any of these properties:
- temperature – The sensor temperature in degrees Celsius.
- acceleration – This is a 3-tuple of X, Y, Z axis accelerometer values in meters per second squared.
- magnetic – This is a 3-tuple of X, Y, Z axis magnetometer values in microteslas.
- gyro – This is a 3-tuple of X, Y, Z axis gyroscope values in degrees per second.
- euler – This is a 3-tuple of orientation Euler angle values.
- quaternion – This is a 4-tuple of orientation quaternion values.
- linear_acceleration – This is a 3-tuple of X, Y, Z linear acceleration values (i.e. without effect of gravity) in meters per second squared.
- gravity – This is a 3-tuple of X, Y, Z gravity acceleration values (i.e. without the effect of linear acceleration) in meters per second squared.
You can view the full setup and code examples on Adafruits’ tutorial
Next steps
Included with the BNO055 library is an example of how to send orientation readings to a webpage and use it to rotate a 3D model.
Resources:
https://learn.adafruit.com/adafruit-bno055-absolute-orientation-sensor/python-circuitpython
https://circuitpython.readthedocs.io/projects/bno055/en/latest/
https://github.com/adafruit/Adafruit_CircuitPython_Bundle
https://github.com/adafruit/Adafruit_CircuitPython_BNO055


