
Setting up Kavita on Raspberry Pi 5: A Guide to Creating Your Own Digital Library
The new level of performance that a Raspberry Pi 5 brings makes it the perfect candidate for hosting your own applications. One of the most rewarding projects is setting up a personal media server. For those with a growing collection of digital comics, manga, and ebooks, Kavita is an excellent open-source server that provides a slick, modern interface for organizing and reading your library from any device. In this article, we’ll walk you through the process of setting up Kavita on your Raspberry Pi 5, leveraging its boosted performance to create a fast and reliable digital library that’s accessible anywhere on your network.
Kavita is a fast, open-source, self-hosted media server designed specifically for digital comics, manga, and ebooks. Unlike general-purpose media servers, it’s built from the ground up to handle large libraries of these file types, while having features like a modern web interface, automatic metadata fetching, and per-user library management. It provides a dedicated and seamless reading experience across devices, solving the common problem of managing and accessing a scattered collection of digital books. For example, you could have a massive manga collection stored on an external hard drive connected to your Raspberry Pi 5. With Kavita, they can easily browse, search, and read their entire library from a web browser on their desktop, a tablet on their couch, or a smartphone while on the go, with their reading progress automatically synced across all devices.
What you’ll need:
Installing Kavita
- Start off by opening the terminal and using these commands to make sure your system is up to date:
sudo apt update
sudo apt upgrade
Use the following command to download the latest version of Kavita by replacing {version} with the version in the title (as of publication: v0.8.7) and {arch} with arm64.
wget https://github.com/Kareadita/Kavita/releases/download/{version}/kavita-linux-{arch}.tar.gz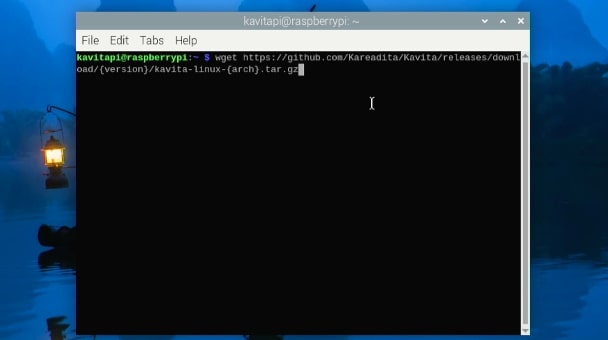
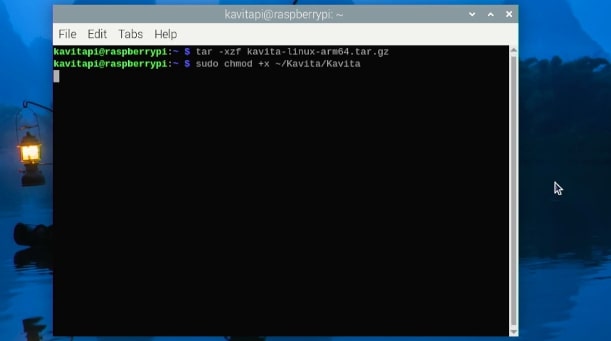
2. Use the following commands to unpack the down Kavita and turn it into an executable. Remember to replace {arch} with arm64.
tar -xzf kavita-linux-{arch}.tar.gz
sudo chmod +x ~/Kavita/Kavita
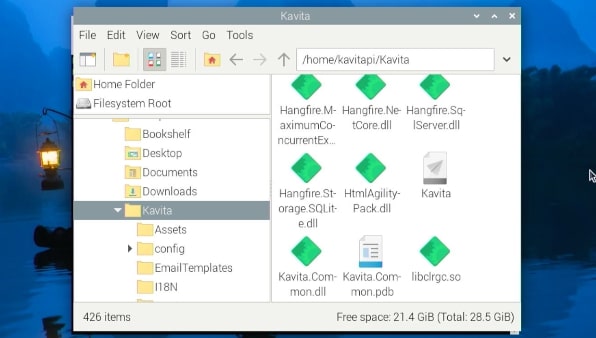
3. Then run the executable file found in the Kavita Folder in your Home
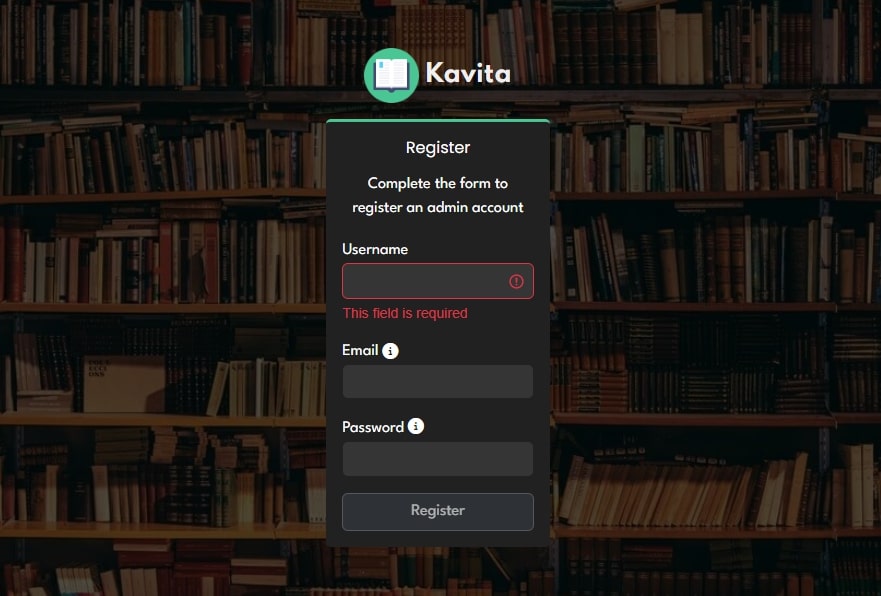
After executing that file, you can connect to Kavita using either http://localhost:5000 or http://{IP address}:5000. You’ll be greeted by a registration window to create your admin account.
Creating a Library
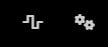
To create your first library, click on the gear icon in the top right, should look like this:
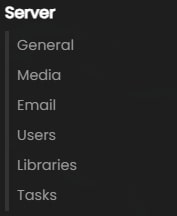
In the menu on the left, look for the Server subheading and then library below that
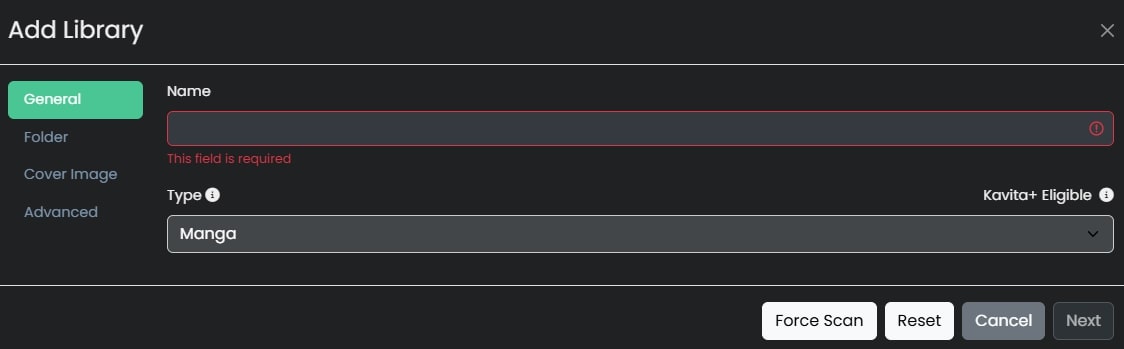
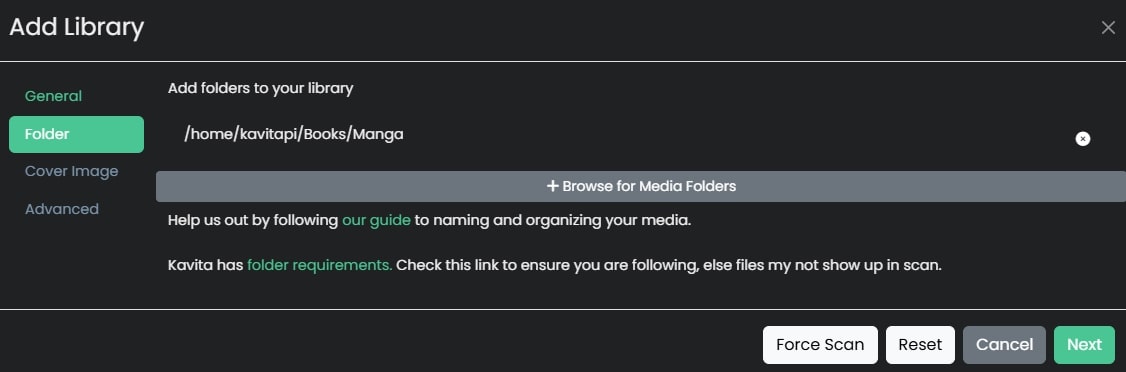
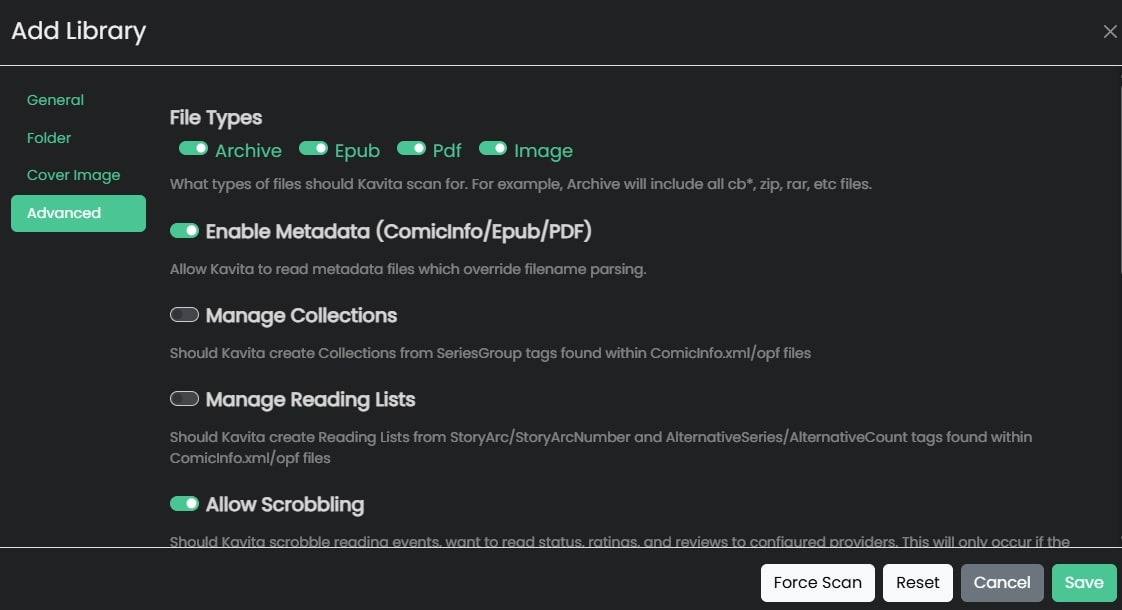
Click on Add Library, and a pop-up will show with text boxes for entering your library name. Fill in the name and type, then click next, and choose the folder where your books are stored. In the Advanced section, you can choose different file types for your library or change other settings. You should be able to find the library in your menu on the home page, then! Just remember to click the 3 dots and scan the library for your books to show.
Conclusion
To wrap things up, we’ve shown you how to transform a powerful Raspberry Pi 5 into a dedicated Kavita server. By leveraging its enhanced performance, you’ve created a robust, self-hosted media server specifically designed for digital comics, manga, and ebooks. This gives you a streamlined way to manage and access your entire digital library from any device, with a modern interface and a smooth reading experience.
Now it’s your turn to give it a try! Set up your own Kavita server, upload your digital library, and enjoy the convenience of having all your favorite reads in one place. We’d love to see your setup—share opinions and tips that you’ve learned from your Kavita setup in the comments below! If you’re looking for a new Raspberry Pi 5 or accessories to get started, you can find everything you need on our website.
For more projects and to explore our full range of Raspberry Pi products, be sure to check out our online store!


