
Project Showcase: We Upcycled a 3D Printer into a Pico-Powered Claw Machine!
Remember that mix of excitement and frustration staring into an arcade claw machine, trying to snag that one prize? What if you could build your very own, right on your desktop?
We did just that! This project isn’t just for fun – it’s a perfect showcase of creative upcycling and the power of the Raspberry Pi Pico. This article will walk you through our custom-built claw machine, showing off how we brought this arcade classic to life. Get ready for some serious maker inspiration!
Our Pico-Powered Claw
We created a fully functional, desktop-sized DIY claw machine. The entire project – from the joystick controls to the 3-axis gantry movement and the claw mechanism itself, is controlled by a single Raspberry Pi Pico running MicroPython. It’s the ultimate example of the Pico’s power for robotics and hardware control. This project shows the importance of choosing the right board for your projects and how a full Raspberry Pi can sometimes be overkill. The Pico is more than capable of handling multiple motor inputs, reading sensors (like limit switches), and running the game logic, all for just a few Rands.
Use Cases:
- A fantastic learning project for understanding robotics, 3-axis movement, and motor control.
- A brilliant centerpiece for a hobby expo or a classroom (STEM education).
- …And, of course, the world’s best way to distribute candy in the office!
How It Comes Together
While this isn’t a full step-by-step tutorial, we have prepared a list of the key components that made this build possible. We’re big believers in “upcycling,” so we reused an old 3D printer enclosure for the frame and its power supply to drive the motors.
Here’s our (basic) parts list:
- The Brain: A Raspberry Pi Pico 2W (W for future wireless control!).
- The Frame & Power: A reused 3D printer enclosure and its internal 5V/24V power supply unit (PSU).
- The Claw and Gantry: A budget-friendly kit from Aliexpress
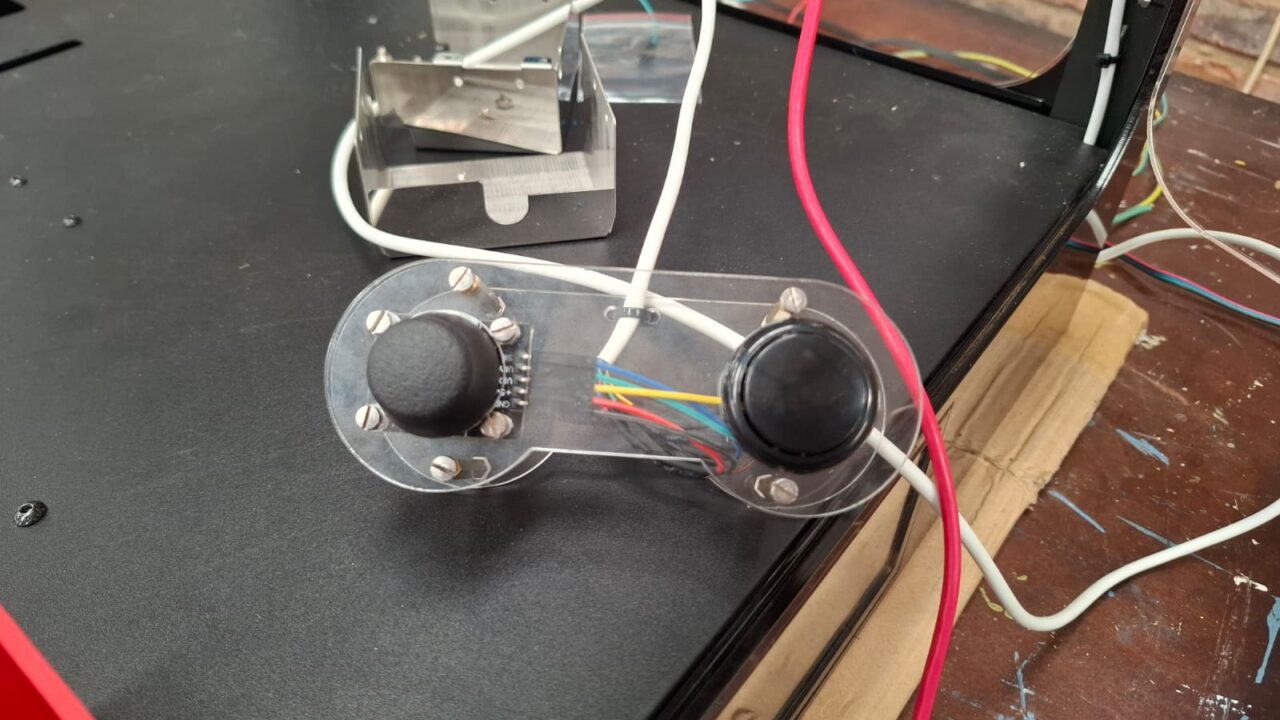
- The Controls: A custom controller made from laser-cut acrylic, housing an arcade joystick and a classic button for the “drop” action.
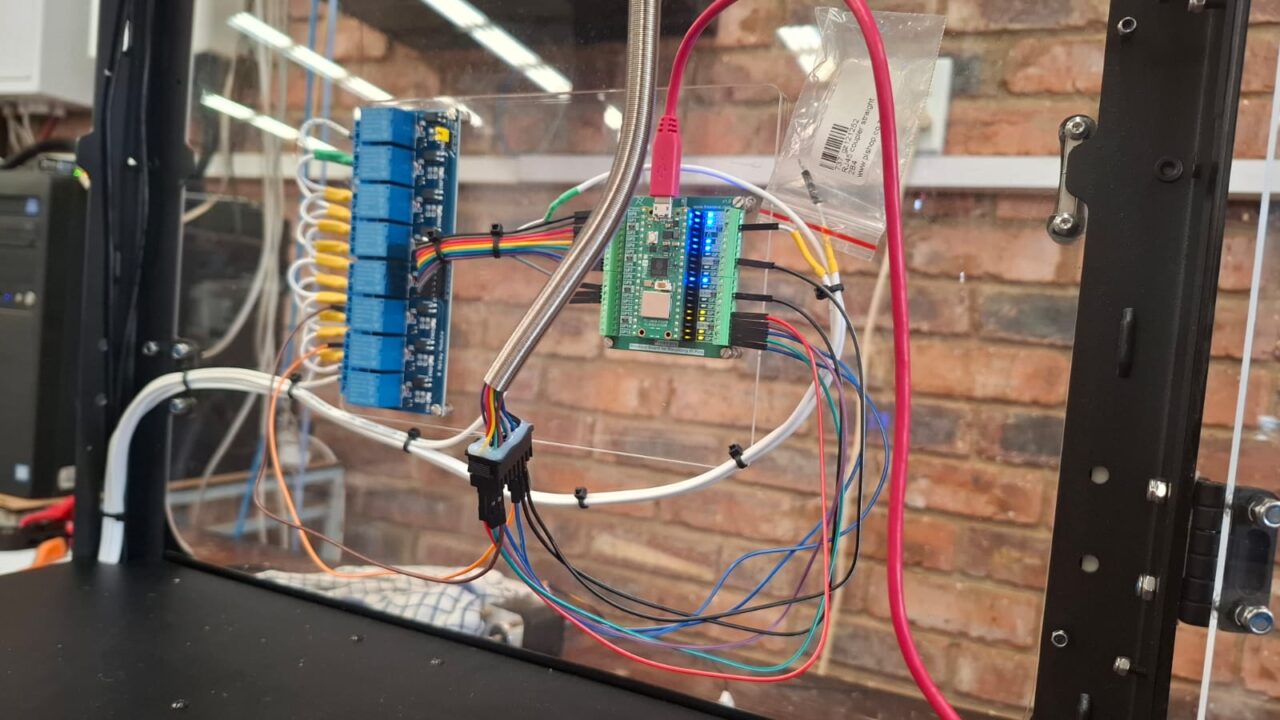
- The Custom Motor Controller: A cheap 8-channel relay module that constantly flipped the polarity of the wiring to control the direction that the motors moved.
- The Code: The logic was all written in MicroPython. It continuously listens for joystick input to move the motors and waits for the button press to run the “drop and grab” sequence. The Code will be available soon!
Pro Tips & Lessons Learned
Building this taught us a few things:
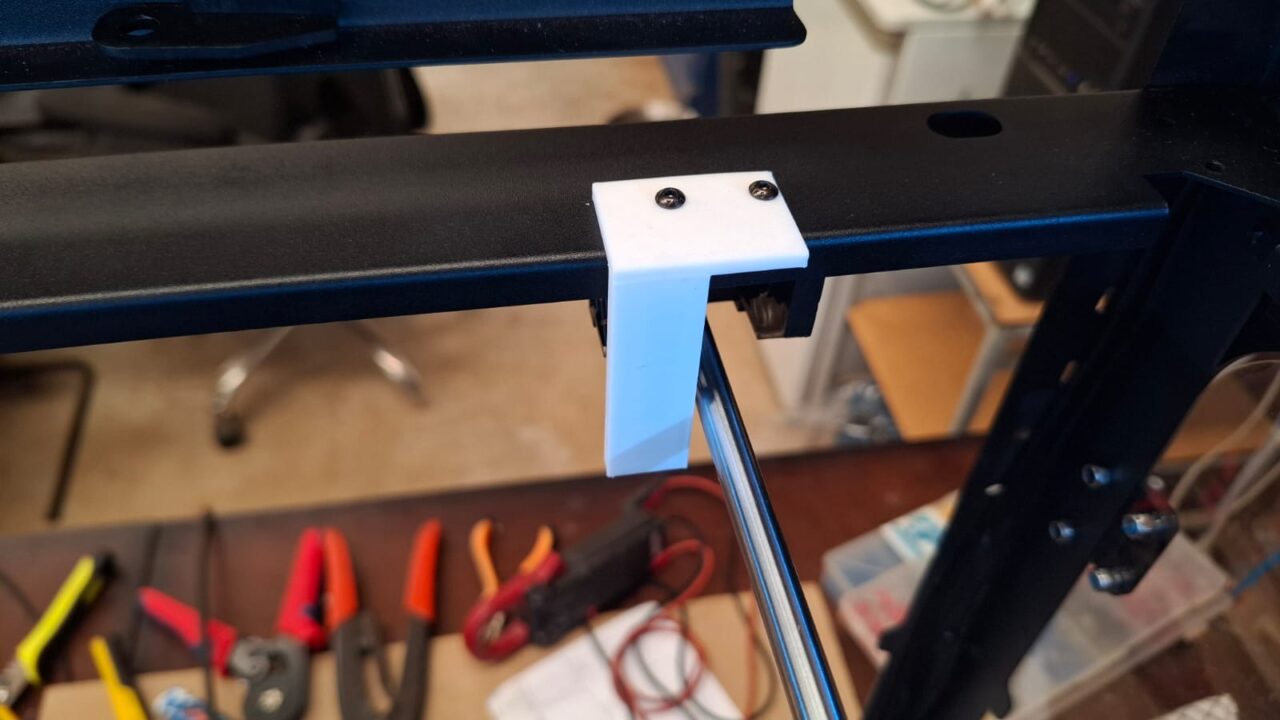
- Hack Your Hardware: The pre-built rails inside the enclosure weren’t designed for our limit switches. We solved it by quickly designing and 3D printing custom end-stop adapters that mount onto the rails, ensuring the gantry stops exactly where it should.
- Reuse That Power: Don’t throw out old tech! We repurposed the old 3D printer’s power supply. It’s perfect for providing the reliable, high-amperage power that stepper motors and servos need, which the Pico’s USB port can’t handle.
- Future Upgrades: We’re already planning V2! We want to add a small speaker to play music and a “winner” sound and a new display to replace the previous proprietary one used for the 3D printer.
Project FAQs
Q: Was it hard to code?
A: It was a fun challenge! The MicroPython libraries for controlling motors are very straightforward. The main task was just building the logic (the “game loop”) to make it all work together. The claw machine kit is missing a vital limit switch on the X-axis so we had to implement position tracking based on time to estimate the position of the claw.
Q: Where did you get the frame?
A: We upcycled! The main body is an old 3D printer enclosure that was perfect for this. The internal gantry is a mix of 3D-printed parts and rails/motors from the claw machine kit.
Q: Could I build this?
A: Absolutely! With a bit of patience and the right parts (and maybe some old tech you have lying around), this is a very rewarding project.
Conclusion
This project was a blast to build and a perfect demonstration of the Raspberry Pi Pico’s versatility. It’s amazing to see a tiny microcontroller confidently manage a complex robotics project like this.
We hope this inspires you to start your own build! What’s the coolest thing you’ve ever made with a Pico? Let us know in the comments!
Ready to start your own Pico project? Head over to our shop to grab your Raspberry Pi Pico and all the motors, sensors, and joysticks you need to bring your idea to life or check out the rest of our blog for more interesting articles and projects!


