
How to Install Jellyfin on Raspberry Pi 5: A Step-by-Step Guide
Did you know that globally, the average household now subscribes to around four streaming services? If you’re a maker, hobbyist, or simply someone looking to take control of your ever-growing media library and break free from subscription stacking, you’re in the right place. This article will guide you through the process of installing Jellyfin, the powerful open-source media server, onto your Raspberry Pi 5, empowering you to stream your entire collection of movies, TV shows, and music to any device in your home. Get ready to transform your tiny computer into a personal media powerhouse!
Jellyfin is a volunteer-built media solution that allows you to stream your media onto any device on your network from your own local media server. Unlike many popular alternatives, Jellyfin offers total freedom from proprietary cloud services and subscription fees, meaning your media remains private and accessible even if your internet goes down. This self-hosted solution solves the problem of “walled gardens” and data privacy concerns, allowing you to centralize your entire collection of movies, TV shows, music, and photos in one elegant interface.
What you’ll need:
- Raspberry Pi 5
- Raspberry pi 5 Power Supply
- 32GB Sd card with OS
- HDMI cable with a Display
- Ethernet or network connection
or
Assembly and Setup Instructions:
1. Before jumping into the commands for installing Jellyfin, make sure that everything is up to date using these commands:
sudo apt update
sudo apt upgrade -y
2. Only a few more steps before we can get started with Jellyfin, due to the apt package manager not supporting repositories running behind https you’ll have to install a package called apt-transport-https to allow it:
sudo apt install apt-transport-https lsb-release3. To secure the process a bit more, we’ll be importing the GPG signing key to the Raspberry Pi, which will help ensure that only software signed by the repository will be installed.
curl https://repo.jellyfin.org/debian/jellyfin_team.gpg.key | gpg --dearmor | sudo tee /usr/share/keyrings/jellyfin-archive-keyring.gpg >/dev/null4. Now that the preparation is over, we can get started with why we’re really here. Adding the Jellyfin repository to the Raspberry Pi. You can use this line to automatically grab the current system’s architecture and its current release and fill in the blanks to automatically generate the correct line for the sources file.
echo "deb [signed-by=/usr/share/keyrings/jellyfin-archive-keyring.gpg arch=$( dpkg --print-architecture )] https://repo.jellyfin.org/debian $( lsb_release -c -s ) main" | sudo tee /etc/apt/sources.list.d/jellyfin.list5. Now just update everything once more and then we’re all set!
sudo apt updateInstalling Jellyfin
1. Simply run the following command to install Jellyfin, you’ll see that it does a few different things during this process including creating a new user called ‘jellyfin’
sudo apt install jellyfin2. To access Jellyfin, open your preferred browser and type the following link:
http://[Your Ip Adress]:8096(Considering changing your Raspberry Pi’s IP to a static IP Address)
3. The setup process is pretty simple. One the first screen jsut choose your language:

4. After clicking next you’ll have to create an account:

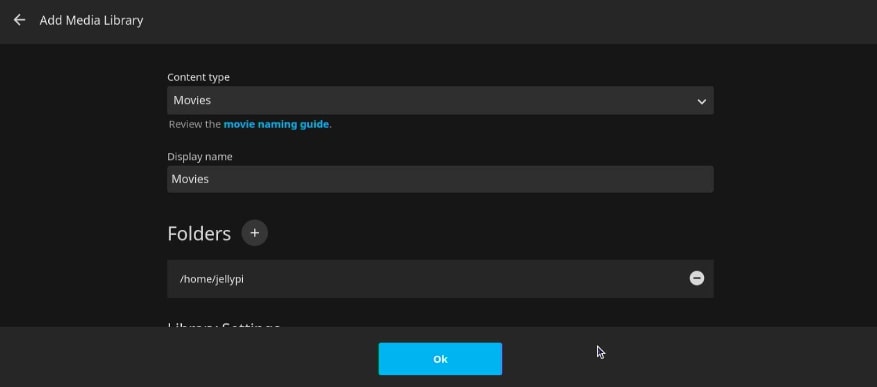
5. To Create a library you’ll click on the big plus block:

Then you choose the content type and the name for this media library. Afterwards add a path to the folder by click the ‘+’ icon next to Folders.

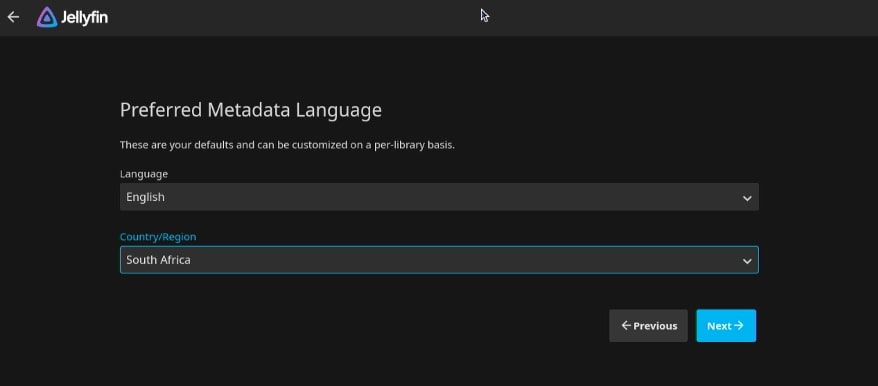
6. After clicking okay, click next and choose your preferred metadata language:
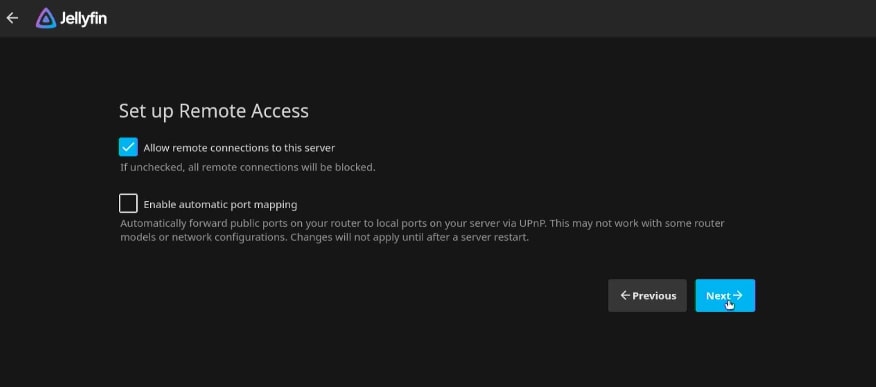
7. You can configure remote access on the next screen.
8. After clicking next, you should be all set! We aren’t quite done yet, we need to configure some permission issues you might find next.
The Permissions issues
1. We’ll need to enter into superuser for this using:
sudo su2. We’ll be using the following commands to run through the folders permissions to allow the jellyfin user to read the media files stored inside
find <strong>[Exampledrivepath]</strong> -type d -exec chmod 755 {} \;
find <strong>[Exampledrivepath]</strong> -type f -exec chmod 644 {} \;
3. Exit out of superuser using:
exitIn this guide, we’ve walked through the straightforward process of setting up your very own Jellyfin media server on a Raspberry Pi 5. You’ve now unlocked the power to escape the endless cycle of subscription stacking and take full command of your digital entertainment. By leveraging the Raspberry Pi 5’s capabilities and Jellyfin’s open-source design, you’ve created a robust, private, and customizable hub for all your movies, TV shows, and music. No more relying on external servers, no more privacy concerns, just your media, on your terms. So, dive in, organize your collection, and start streaming your way to true media freedom! If you’re looking for more projects like this, check out the rest of our blog and our socials, I can guarantee that we’ve got something for you!


