From Card To Console: an RFID-Powered Game Launcher
Beginner, Desktop, Home Automation, PiShop, Platforms, Projects, Skills beginner, Python, retro, rfid, sensors, Tech 0
What if launching a game or application was as simple as tapping a card on your desk? No menus, no mouse clicks — just a quick scan and you’re in.
Brief Overview
RFID technology is usually associated with access control and payment systems, but it’s also an incredibly powerful tool for interactive demos, gaming setups, and educational projects. In this article, we’ll show you how to build a Windows-based RFID launcher that uses physical RFID tags to start applications or games automatically.
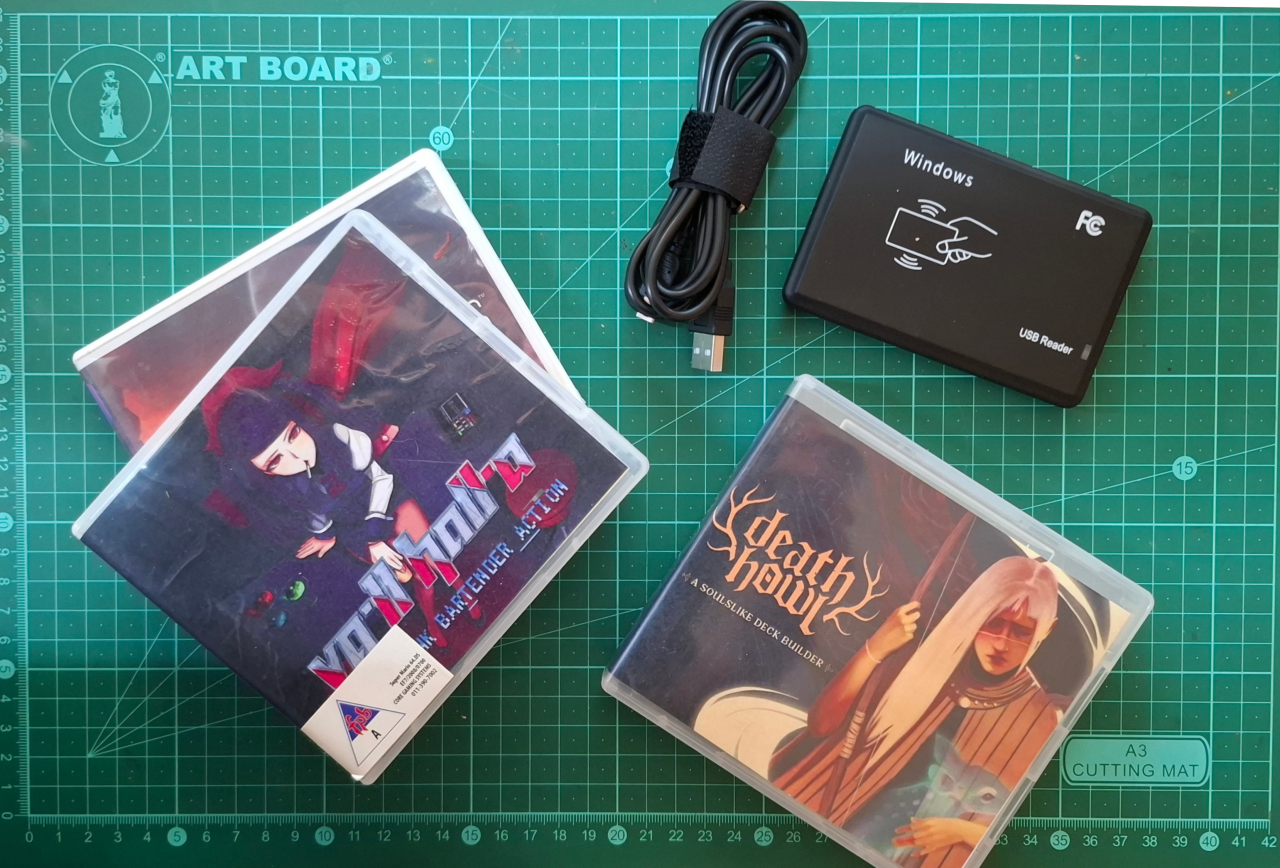
This project is especially appealing for retro gaming enthusiasts, because platforms like GoG (Good Old Games) offer DRM-free titles. That means you can launch your games directly from your PC without needing extra clients or internet connections — a perfect fit for a physical, tag-based launcher.
This project is ideal for makers, educators, retro gaming enthusiasts, and event demos, and it uses readily available RFID readers and accessories that you can find on our storefront.
What You'll Learn
By the end of this guide, you’ll understand how to:
Read RFID tags on a Windows PC
Map RFID IDs to applications or games
Build a flexible, configurable launcher using Python
What it is and Why it matters to us
This project uses a USB RFID reader (configured as a keyboard input device) and a Python script to detect RFID tag IDs. Each tag ID is mapped to a specific application, game, or command, allowing physical RFID cards or tokens to act as launchers.
In simple terms:
Scan a tag → the app or game connected to that tags ID launches automatically
We approached this with the intention to bridge the gap between physical interaction and digital systems, offering:
A tactile, engaging experience
A form of commitment to the game that you’ll be playing
Because the RFID reader behaves like a keyboard, no special drivers or hardware interfaces are required, making this project both robust and beginner-friendly. You could use this script for retro gaming setups, kiosk systems or regular game libraries.
Step-by-Step Guide
What You'll Need:
A Windows PC
Python 3 installed
Step 1: Install Required Software
Ensure Python is installed, then install the required library:
python -m pip install keyboard
Note: The script must be run as Administrator, as the keyboard library listens for global input.
Step 2: Create the RFID Mapping File
Create a file called tags.json:
{"3697895220": "C:\\Games\\Doom\\doom.exe","1234567890": "C:\\Emulators\\RetroArch\\retroarch.exe"}
This file allows you to change which applications launch without modifying the code.
Step 3: Create the Python Launcher Script
Create a file called rfid_launcher.py:
					import json
import keyboard
import subprocess

with open("tags.json", "r", encoding="utf-8") as f:
    TAG_ACTIONS = json.load(f)

buffer = ""

def on_key(event):
    global buffer

    if event.name == "enter":
        if buffer in TAG_ACTIONS:
            subprocess.Popen(TAG_ACTIONS[buffer], shell=True)
        buffer = ""
    elif event.name.isdigit():
        buffer += event.name

keyboard.on_press(on_key)
keyboard.wait()
This script:
Captures the RFID tag ID
Matches it against
tags.jsonLaunches the corresponding application
Step 4: Test the Setup
Run the script as Administrator
Scan an RFID tag
The assigned app or game should launch instantly
Conclusion
Key Takeaways
RFID tags can be used for far more than access control
A simple USB RFID reader and Python script can create powerful physical launch systems
This project is flexible, affordable, and highly customisable
Whether you’re building a retro game station, an interactive demo, or an educational tool, this RFID launcher is a great foundation to experiment with.
Explore our range of RFID readers, tags, Raspberry Pi boards, and maker accessories to start building your own interactive projects — and let us know how you’ve put RFID to use in your setup!