
DIY Portable Edge-Lit Acrylic Book Light with Raspberry Pi Pico | Part 1 The Hardware
3D Printing, Beginner, Other, PiShop, Platforms, Projects, Raspberry Pi Pico, Resources, Skills, Tutorial raspberry pi, raspberry pi pico, reading, Tech, transistor 0
Late-night reading should be relaxing, but harsh bedside lamps often disrupt your sleep cycle or disturb a sleeping partner. Commercial book lights can be overly bright, concentrate light unevenly, or emit cool blue light that suppresses melatonin production. I’ve actually be seeing an advertisement all over my Instagram lately which has been the inspiration for this project, I just figured I could make this product pretty easily and more cost effective.
In this tutorial, we will build a sleek, portable edge-lit acrylic reading light. By coupling a clear acrylic panel with a warm-orange 300mm flexible LED filament, a Raspberry Pi Pico, and the Waveshare Pico-UPS-B module, you can create a zero-blue-light reading tool with continuous light distribution and rechargeable battery power.
Why am I Using a Flexible LED Filament?
Traditional edge-lit projects often use WS2812 or NeoPixel RGB strips. While color-changing LEDs offer flexibility, individual LED chips project distinct cone-shaped glare points along the acrylic’s edge.
By switching to a 300mm 3V Flexible LED Filament, you gain several key advantages for nighttime reading:
100% Uniform Diffusion: The continuous filament eliminates hot spots, delivering a clean, even sheet of illumination across the entire reading area.
Warm Amber Color (2200K): Emits a warm tone with negligible blue wavelength output, preserving night vision and sleep hygiene.
Simple Analog Control: It operates at about ~3V DC which eliminates the need for logic level shifters or complex digital protocols, a simple transistor driven by Pico PWM handles dimming.
What You'll Need
This project is for the hardware itself, I’ll be posting the enclosure design later when I’ve finalised it. Be prepared to need a laser cutter for the enclosure, or a 3D printer if you’re feeling adventurous.
Assembling the Hardware & Wiring
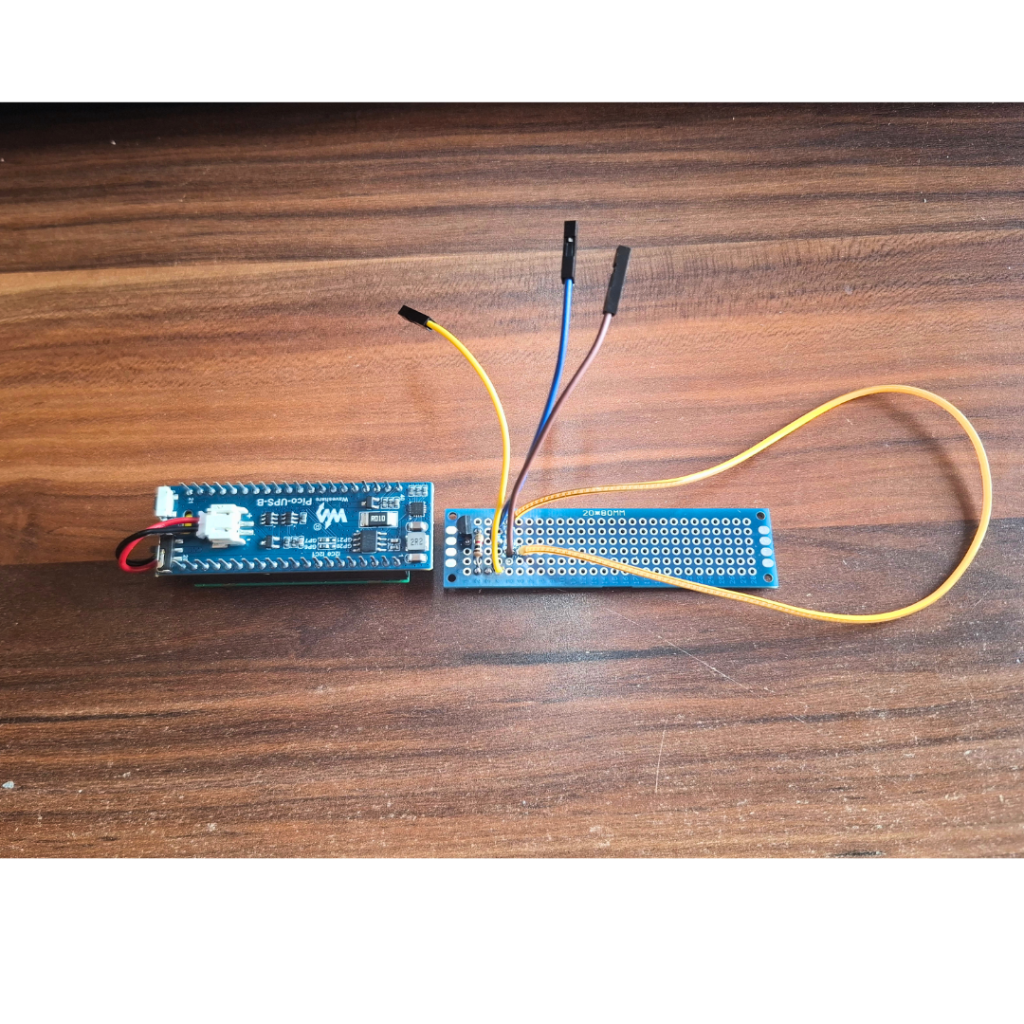
Because the 300mm filament draws around 100mA to 150mA, it cannot be driven directly from a Pico GPIO pin (which maxes out at 12mA). The 2N2222A NPN transistor acts as an electronic switch, allowing a 3.3V PWM signal from pin GP0 to control the higher-current circuit safely.
You’ll find a picture of my project below, a mighty fine picture if I do say so myself. I decided to try out a Prototyping board because I haven’t had the chance yet and it really goes to show how I really don’t enjoy soldering projects.
Connections Guide
| Component | Connected To | Notes |
| Pico Board | Stacks onto Pico-UPS-B | Draws battery power directly through headers |
| Filament Positive (+) | Pico Pin 36 (3V3 OUT) | Supplies 3.3V power to the filament |
| Filament Negative (-) | Transistor Collector (Pin 3 / Right) | Current flows into collector when active |
| Transistor Emitter (Pin 1 / Left) | Pico Pin 38 (GND) | Shared system ground reference |
| Pico GP0 (Pin 1) | 1kΩ Resistor –> Transistor Base (Pin 2 / Middle) | Controls switching and PWM dimming |
The MicroPython Code
The code below implements smooth fade-in/fade-out transitions, PWM brightness control, and battery monitoring via the INA219 sensor on the Waveshare Pico-UPS-B.
					import machine
import time

# ==========================================
# HARDWARE CONFIGURATION
# ==========================================
PWM_PIN = 0            # Connected via 1k resistor to Transistor Base (GP0 / Pin 1)
I2C_SDA_PIN = 6        # Pico-UPS-B INA219 SDA (GP6 / Pin 9)
I2C_SCL_PIN = 7        # Pico-UPS-B INA219 SCL (GP7 / Pin 10)
UPS_I2C_ADDR = 0x43    # Pico-UPS-B INA219 default I2C address

# Initialize Hardware
filament = machine.PWM(machine.Pin(PWM_PIN))
filament.freq(1000)    # 1kHz frequency ensures flicker-free dimming

i2c = machine.I2C(1, scl=machine.Pin(I2C_SCL_PIN), sda=machine.Pin(I2C_SDA_PIN), freq=100000)

# ==========================================
# CONTROL FUNCTIONS
# ==========================================

def set_brightness(percent):
    """Sets light brightness level (0% to 100%)."""
    percent = max(0, min(100, percent))
    duty = int((percent / 100.0) * 65535)
    filament.duty_u16(duty)

def fade_in(target_percent=20, duration=1.5):
    """Fades light on gradually to keep eyes night-adjusted."""
    steps = 50
    delay = duration / steps
    for i in range(steps + 1):
        current_pct = (target_percent * i) / steps
        set_brightness(current_pct)
        time.sleep(delay)

def get_battery_voltage():
    """Reads bus voltage from the Pico-UPS-B INA219 power monitor."""
    try:
        raw_data = i2c.readfrom_mem(UPS_I2C_ADDR, 0x02, 2)
        val = (raw_data[0] << 8) | raw_data[1]
        voltage = (val >> 3) * 0.004
        return voltage
    except Exception:
        return None

# ==========================================
# MAIN ROUTINE
# ==========================================

def main():
    # 1. Smoothly activate reading light to a warm 20% brightness
    fade_in(target_percent=20, duration=1.5)

    # 2. Main loop: monitor battery status
    while True:
        v_bat = get_battery_voltage()

        # If battery drops below ~3.4V under load, drop brightness to preserve energy
        if v_bat is not None and v_bat < 3.4:
            set_brightness(10)  # Dim to 10% on low battery

        time.sleep(10)

if __name__ == '__main__':
    main()
Conclusion
By combining the low-blue warm glow of a 3V flexible LED filament with the power management of the Raspberry Pi Pico and Waveshare Pico-UPS-B, you get a clean, flicker-free night reading light built for sleep-friendly late-night sessions.
With our control circuit, PWM dimming script, and battery monitoring logic fully operational, the hardware core of our reader is complete. Next up, we’ll put together a custom enclosure, stay tuned for our upcoming laser-cutting guide, where we’ll design and cut a custom acrylic panel and housing to complete the build!