
8 Useful Raspberry Pi Pico Projects
Bringing your ideas to life can be quite a daunting task, especially with the amount of micro-controllers on the market. Enter the Raspberry Pi Pico. At it’s core, the Pico is a tiny yet powerful micro-controller which has become a favourite among hobbyists and professionals. With it’s low cost but high performance built around the RP2040 and RP2350 (depending on which version). It’s offers a nice blend between simplicity and power. From automating your home to building a custom keyboard, this article will explore ten useful ways to use the Raspberry Pi Pico to create something truly remarkable.
1. Pico W Audio to Bluetooth Adapter by Sean
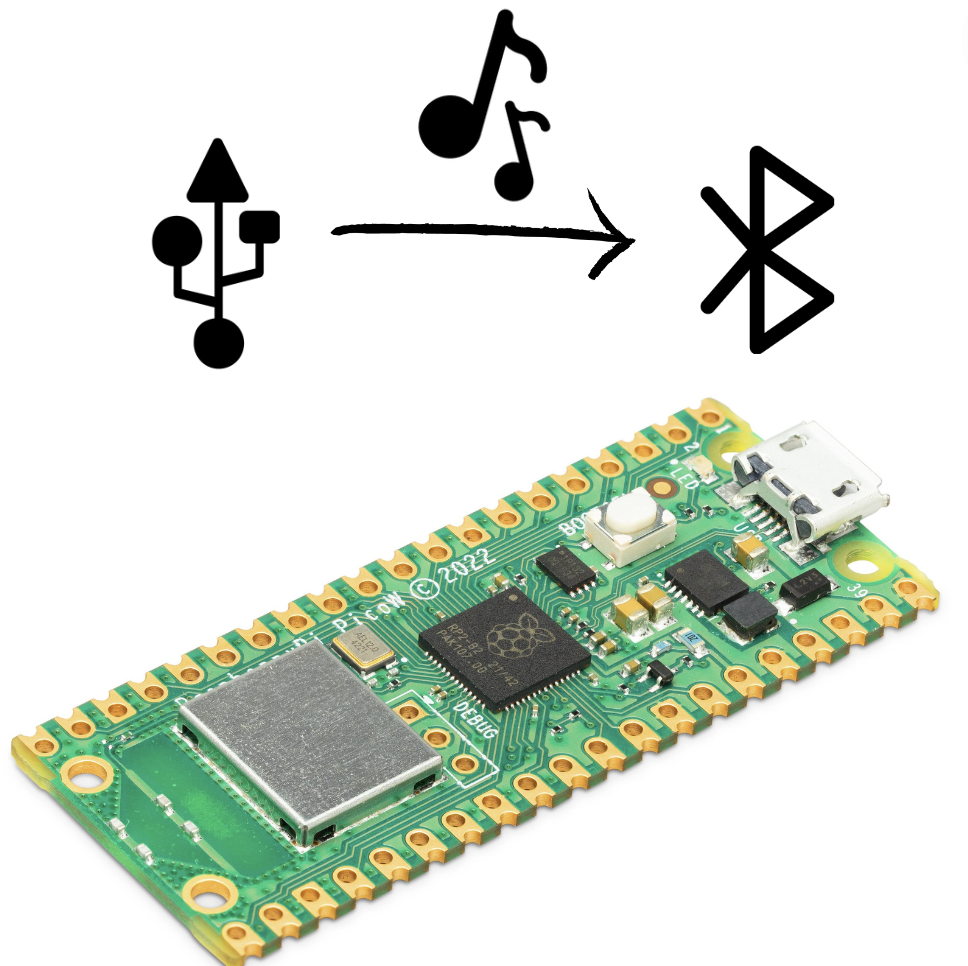
Imagine having a simple, low-cost device that can turn any old stereo, game console, or PC into a wireless audio powerhouse. That’s exactly what this project does. By flashing some firmware onto the Raspberry Pi Pico W , you can transform it into a high-quality audio streaming device. This project is a game-changer for anyone who wants to stream audio wirelessly from their favorite devices—including macOS, Windows, Linux, and even game consoles like the Nintendo Switch or PlayStation 5—to their Bluetooth headphones or speakers. The best part? The setup is completely hassle-free and driver-free. You simply plug the Pico W into your device’s USB port, put your audio output in pairing mode, and it connects automatically, utilizing the SBC codec to ensure a high-quality, stereo listening experience.
Hackaday Project Page: https://hackaday.io/project/191939-pico-w-usb-audio-to-bluetooth-adapter
How to Use the Pico W Bluetooth Audio Dongle
Using the Pico W USB Audio to Bluetooth Adapter is designed to be a straightforward and driver-free process. Follow these simple steps to get your wireless audio streaming in no time.
- Connect to Your Audio Source: Begin by plugging your Raspberry Pi Pico W into the USB port of the device you want to stream audio from using a micro-USB cable. This could be your computer, a gaming console, or a stereo system.
- Select Audio Output: On your source device, navigate to the sound settings and change the audio output to the newly recognized device, which should be named something similar to
USB Bluetooth Audio. - Pair Your Headphones or Speakers: Put your Bluetooth headphones or speakers into their pairing mode. The Pico W adapter is designed to automatically detect and connect to a device in pairing mode, establishing a high-quality audio link.
- Start Playing Audio: Once the connection is established, simply start playing your audio, and it will be streamed wirelessly to your Bluetooth device via the Pico W.
Tips for a Smooth Experience:
- Pairing a New Device: If you need to pair a different device, long-press the
BOOTSELbutton on the Pico W and then release it. The Pico will enter pairing mode, and you can connect your new Bluetooth device. - Reconnecting: If you temporarily disconnect your headphones or speakers, you can easily reconnect them by giving the
BOOTSELbutton a quick, short press. This will re-establish the connection without having to go through the full pairing process again. - Resolving Noise Issues: If you encounter a known issue with out-of-sync audio that results in noise, a quick fix is to short-press the
BOOTSELbutton a few times. This will re-sync the audio connection and clear up the sound.
Project Components:
2. Pico Macro Keyboard V2 by NerdCave
A macro pad is a compact, programmable keyboard that simplifies life a bit by being able to bind different mechanisms to the buttons. This project transforms a Raspberry Pi Pico into a powerful, customizable macro keyboard that you can use with any computer. Instead of a full-sized keyboard, you’ll have a small, dedicated pad with a few keys, each programmed to perform a specific action. This is incredibly useful for a variety of applications, from gaming and streaming to video editing and graphic design. With a single button press, you can mute your microphone, paste a block of code, or trigger a complex in-game maneuver. The Pico’s ability to act as a USB Human Interface Device (HID) allows it to emulate a keyboard, so your computer recognizes it instantly without needing any special drivers. This project is a fantastic way to boost your productivity and streamline your workflow.
NerdCave Project Page: https://nerdcave.xyz/docs/projects/pico-macro-keyboard-v2/
Project Components:
- 1 x Raspberry Pi Pico
- 11 x Mechanical Switches
- 1 x Rotary Encoder
- 1.3″ OLED I2C
- What we’ve got: 0.96″ OLED I2C
- 10K Resister
- 2.54 20 pin Header
- 2.54 4 pin Header
- WS2810B LED strip
- What we’ve got: WS2812 RGB Led Strip
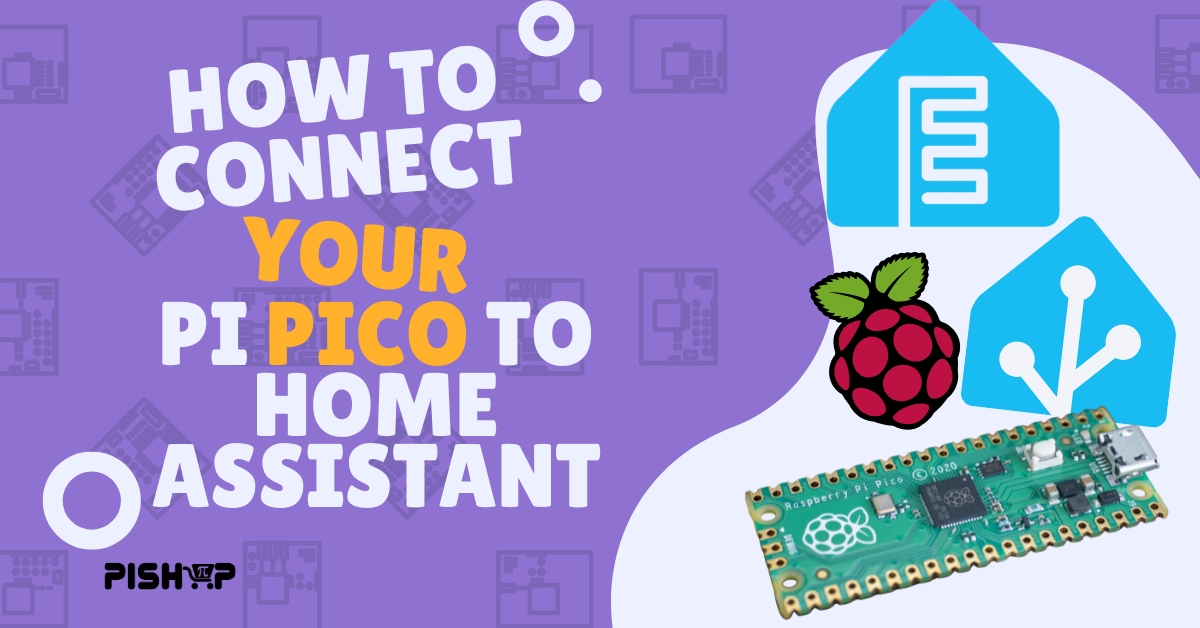
3. Smart Home Controller by PiShop
The Raspberry Pi Pico W can be used to create a custom smart home hub for simple home automation tasks. By combining the Pico with a free and open-source platform like ESPHome, you can easily connect various sensors and devices to your home network. For example, you could create a room presence detector that turns lights on when someone enters and off when they leave, or a temperature sensor that controls a fan to maintain a comfortable temperature. Because ESPHome integrates with powerful smart home platforms like Home Assistant, the Pico can act as a bridge, allowing you to control and monitor devices and sensors from a centralized dashboard on your phone or computer. This project is a great, low-cost way to get started with home automation. Make sure to check this article out and more on our blog!
PiShop Project Page: How to Connect your Pi Pico to Home Assistant
Project Components:
- Raspberry Pi Pico WH
- DHT11 Temperature and Humidity Sensor
- Female – Female Jumper Cables
- Official Raspberry Pi USB-A to Micro-B Cable
- Home Assistant Setup
4. Pico Plant Waterer by Ashley Whittaker
Keep your plants thriving with an automated plant watering system. This project uses a Raspberry Pi Pico as the brain of a simple system that monitors soil moisture and waters your plants automatically. You’ll need a soil moisture sensor, a small water pump, and a few other components. The Pico is programmed to read the data from the sensor and, when the soil moisture drops below a certain level, it activates the pump to water the plant. This project is ideal for those with a busy schedule or a tendency to forget to water their plants, ensuring your plants receive the right amount of water at the right time.
Raspberry Pi Project Page: https://www.raspberrypi.com/news/pico-plant-waterer/
Project Components:
- Raspberry Pi Pico
- Waveshare SSD1351 1.5-inch RGB OLED module
- WGCD KY-040 Rotary Encoder
- Capacitive soil moisture sensor
- Relay switch
- Fish tank water pump
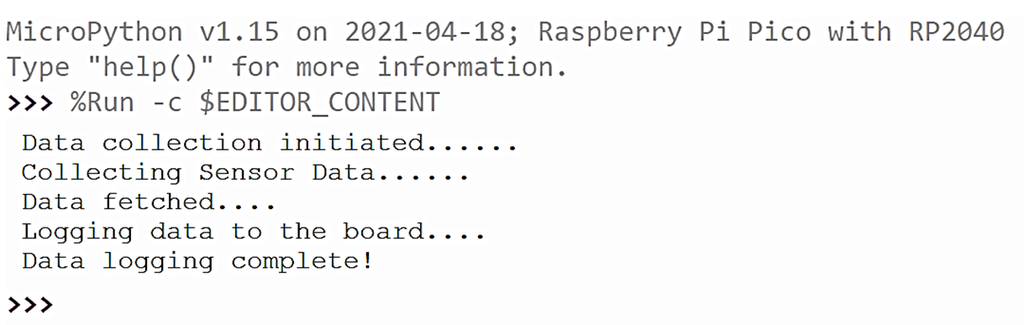
5. Data Logging With Raspberry Pi Pico by Madhavan Thothadri
The Raspberry Pi Pico’s low power consumption and small form factor make it perfect for long-term data collection. This project turns the Pico into a simple yet effective data logger, capable of recording information from various sensors over time. By connecting a sensor, such as a temperature or humidity sensor, and a microSD card module to the Pico, you can program it to log sensor readings at regular intervals. This data is written directly to a CSV (Comma Separated Values) file on the SD card. This makes it a great solution for tracking environmental changes in a greenhouse, monitoring the conditions of a beehive, or conducting a long-term science experiment. The data can then be easily transferred to a computer for analysis.
Instructables Project Page: https://www.instructables.com/Data-Logging-With-Raspberry-Pi-Pico/
Project Components:
6. Raspberry Pi Pico Gamming Console
For fans of retro gaming, the Raspberry Pi Pico can be the perfect brain for a custom handheld arcade machine. Despite its small size, the Pico has enough processing power to run classic games and emulators. This project involves connecting a small LCD screen, a joystick, and a few buttons to the Pico to create a fully playable console. You can either build a compact, standalone device or integrate it into a larger, arcade-style cabinet. This project is not only a fun way to bring your favorite games back to life but also a great opportunity to learn about display drivers, user input, and game development. I’ll be linking to some excellent videos that walk you through the entire build process.
YouMakeTech.com Project Page: https://www.youmaketech.com/raspberry-pi-pico-retrogaming-system/
Project Components:
- Raspberry Pi Pico
- I2C 0.96 Inch SSD1306 OLED Display Module 128×64 pixels
- Micro Push Button Switch, Momentary Tactile Tact Touch, 6x6x6 mm, 4 pins
- 9042 Mini Piezo Buzzer Speaker 3.3V
- Solderless Breadboard
- Solderable Breadboard
- Dupont Wires Assorted Kit (Male to Female + Male to Male + Female to Female)
- Preformed Breadboard Jumper Wires
- PLA Filament
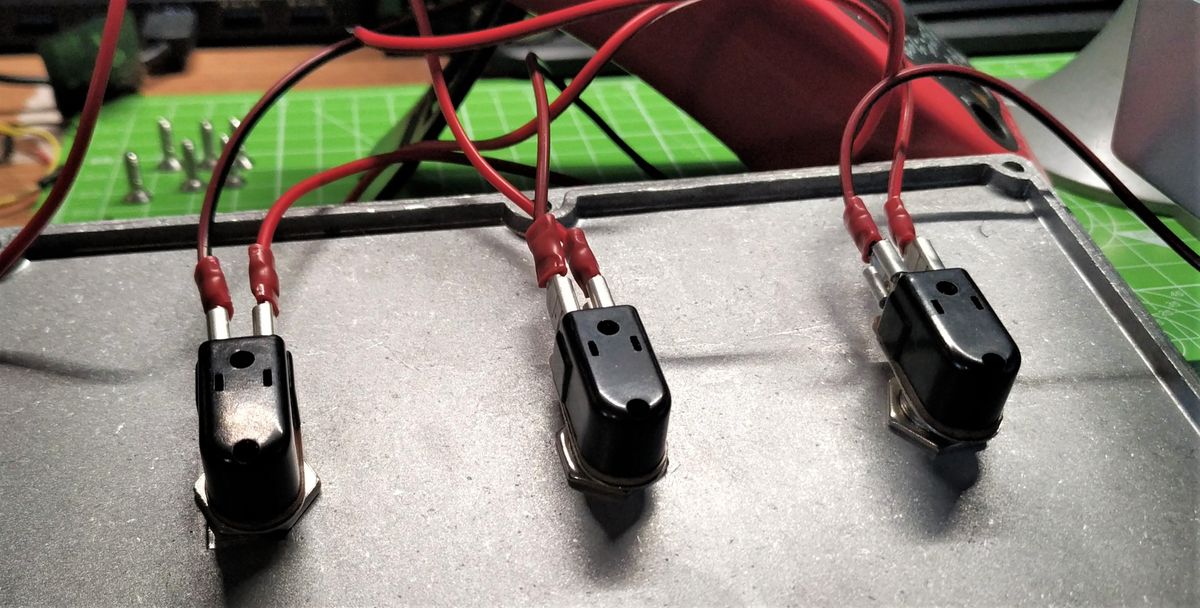
7. USB Foot Pedal by Les Pounder
A foot pedal is an incredibly useful tool for hands-free control, especially for transcribers, gamers, or live streamers. This project uses a Raspberry Pi Pico to create a fully customizable USB foot pedal that acts as a keyboard. You can program the pedal to trigger a single keystroke or a complex macro. For a live streamer, this could mean muting a microphone, switching scenes, or starting an advertisement break with a simple tap of the foot. For a transcriptionist, it can be used to start and stop audio playback, allowing you to keep your hands on the keyboard. This project leverages the Pico’s USB HID capabilities to provide a simple yet powerful hands-free input device.
Project Components:
- Raspberry Pi Pico
- 3 x Momentary guitar effects pedal push buttons
- Aluminum project box (6 x 4 x 3.5 inch)
- 4 x Male to male jumper wires
- Half breadboard
- Screw terminal (optional)
- Soldering equipment and heat shrink
- Electric drill and stepped drill bit
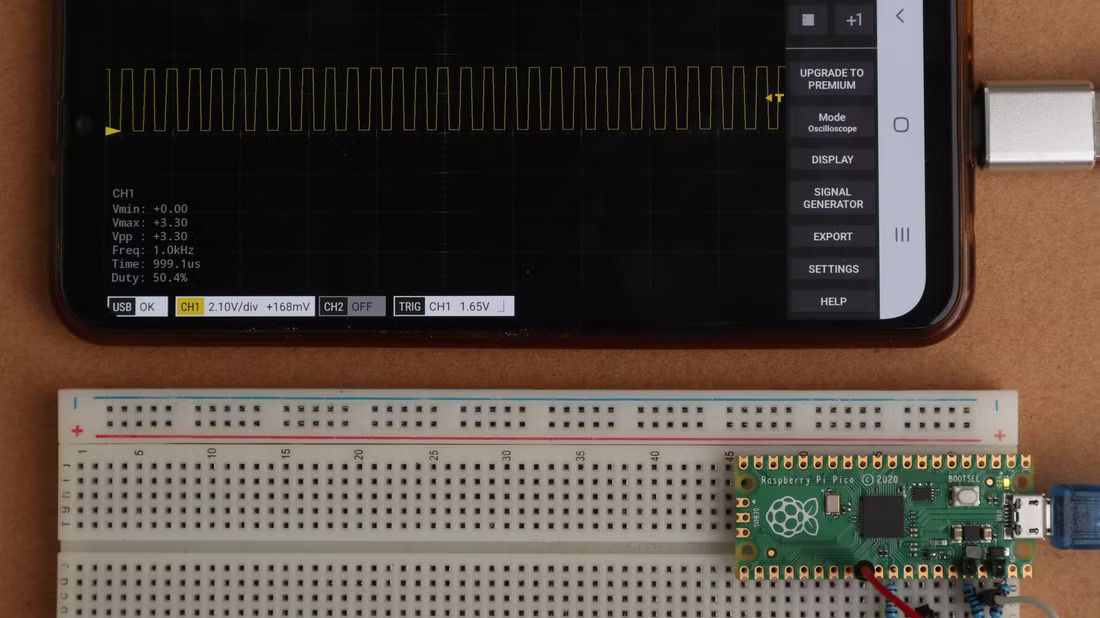
8. The Digital Oscilloscope by Jayric Maning
An oscilloscope is a piece of test equipment used to visualize electronic signals, but commercial units can be expensive. With the Raspberry Pi Pico, you can build your own simple digital oscilloscope. The Pico’s high-speed Analog-to-Digital Converter (ADC) allows it to accurately measure voltage signals over time. By using the Pico’s fast processor and a graphical display, you can visualize the waveform of a signal. While it may not have all the features of a professional oscilloscope, it is a fantastic learning tool for electronics enthusiasts, providing a low-cost way to analyze and understand how electrical signals behave in a circuit. This project is ideal for students and hobbyists looking to explore more advanced electronics concepts.
makeuseof.com Project Page: https://www.makeuseof.com/raspberry-pi-pico-build-oscilloscope/
Project Components:
- Raspberry Pi Pico
- Jumper Cables Male to Male Ribbon of 40 x 100mm
- Resistors (1K Ohm 5%) (10 pack)
- Resistors (10K Ohm 5%) (10 pack)
Conclusion
From building custom arcade games to creating smart home controllers, we’ve explored just a glimpse of the vast potential of the Raspberry Pi Pico. This tiny board’s blend of affordability, performance, and simplicity makes it an ideal platform for both beginners and seasoned makers. Whether you’re looking to enhance your productivity with a macro pad, automate your gardening with a plant waterer, or simply learn more about electronics with a data logger or oscilloscope, there is a Pico project for every skill level and interest. If you’ve completed any projects based on the Raspberry Pi Pico make sure to leave it in the comments or even better submit it on our homepage for us to read about it!


