
How to Enhance Your Audio with Raspberry Pi and moOde | PiShop | MoOde Audio |
Did you know the Raspberry Pi 5 is up to three times faster than its predecessor, making it one of the most powerful and versatile single-board computers available today?
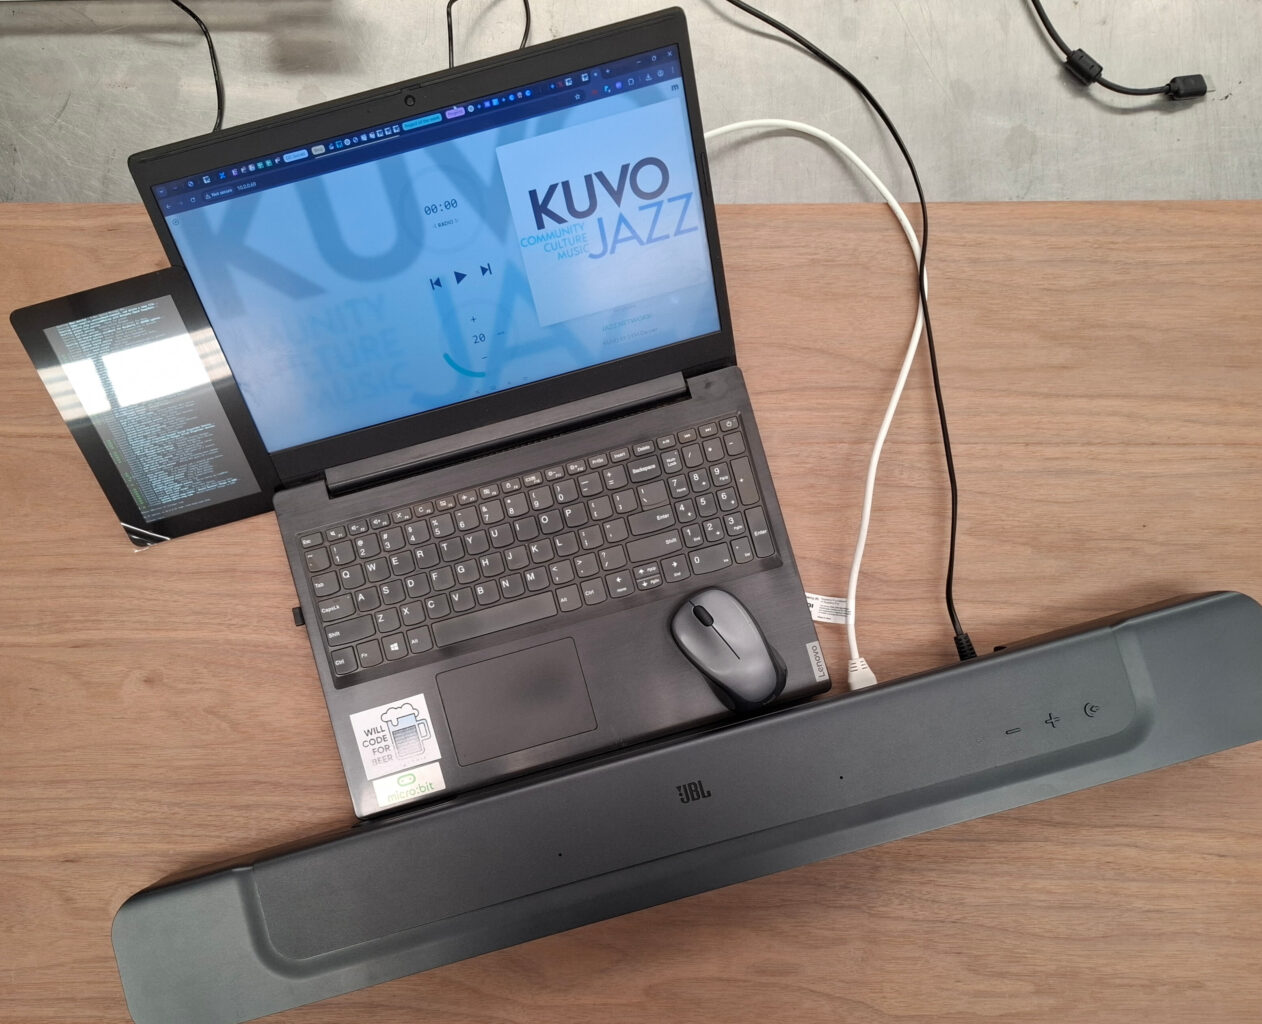
In this article, we’ll show you how to transform a Raspberry Pi 5 into a powerful and sleek HiFi media hub using MoOde Audio and a JBL Soundbar. Whether you’re a tech hobbyist looking to elevate your audio setup or a curious Raspberry Pi enthusiast ready to explore the world of network streaming and high-fidelity playback, this project is as satisfying as it is sonically rewarding.
Read on to discover how to set up the software, connect your gear, and fine-tune your sound—your ears will thank you.
What You’ll Need:
- Raspberry Pi 5 Kit (with case, power supply, SD Card, and HDMI Cable)
- JBL Soundbar with HDMI or AUX input or any speaker that you’d like to use
- Ethernet cable or Wi-Fi connection
- Computer to flash the SD card
- MoOde Audio OS image
Step-by-Step Instructions
1. Flash MoOde Audio to the SD Card
- Download the latest MoOde Audio image from moodeaudio.org or you can find MoOde Audio Player in the Media Player OS section on the Raspberry Pi Imager.
- Use software like the Raspberry Pi Imager to flash the image onto your SD card, and don’t forget to add your network settings and passwords.
- Insert the SD card into the Raspberry Pi 5 and power it on.


2. Connect to MoOde’s Interface
- After booting, connect your Pi to your network (Wi-Fi or Ethernet).
- On another device, open a browser and go to
http://moode.local or find the IP address via your router and use http://[Your IP Address]. - You’ll see MoOde’s web-based interface—this is your control panel for all audio functions.
3. Configure Audio Output
- Go to Audio > Configure Output and select
HDMIif you’re connecting your JBL Soundbar via HDMI, but it should automatically use HDMI output. - For AUX (3.5mm), choose
Headphonesor similar (You might need a DAC depending on the board you are using). - Apply the settings and reboot if necessary.
4. Optimize Settings for Best Sound
- Enable Volume Normalization and Auto-Resample under the Audio Settings menu.
- Set up Library access (USB drives, NAS, or streaming services) under the Library section.
5. Connect and Enjoy
- Plug your Raspberry Pi into the JBL Soundbar via HDMI or AUX.
- Play music from local files, network shares, Spotify (via Spotify Connect), or Internet Radio.
- Control playback with any device on the same network using the MoOde web interface.
Connection Options: HDMI vs AUX
| Feature | HDMI Output | AUX (3.5mm Jack) |
|---|---|---|
| Audio Quality | Digital (best fidelity) | Analog (lower fidelity) |
| Volume Control | Controlled via TV/soundbar | Controlled via Pi software |
| Setup Complexity | Plug and play | May require volume fine-tuning |
| Recommended For | Soundbars, modern AV | Simpler speaker setups |
Tips for Getting the Best Experience
- Use Ethernet for more stable streaming if possible.
- Add a DAC for even higher audio fidelity if your soundbar supports it.
- Enable AirPlay, Spotify, etc. in MoOde for easy streaming from iOS/macOS devices.
- Try MoOde’s built-in Parametric EQ to tailor the sound to your room.
This setup is perfect for turning any room into a high-quality streaming audio space with just a Raspberry Pi 5 and a great soundbar. In the next section, we’ll explore some optional upgrades and add-ons you can try to enhance your HiFi rig even further.
Conclusion
Creating a HiFi audio setup with the Raspberry Pi 5, MoOde, and a JBL Soundbar is a rewarding project that combines powerful tech with audiophile-quality sound. We covered everything from flashing MoOde onto your Pi, configuring audio output, and optimizing settings, to comparing HDMI and AUX connections. With just a few components and some simple steps, you can transform your Raspberry Pi into a sleek, high-performance music hub.
We encourage you to try this project for yourself—whether you’re a music lover, maker, or tinkerer, it’s a great way to explore the potential of your Raspberry Pi. Don’t forget to browse our online store for Raspberry Pi boards, accessories, sound gear, and more. And if you’ve built your own Pi-powered sound system, we’d love to hear about it! Share your experience in the comments below or tag us on social media and if you’re looking for more projects like this then check out the rest of our blog here and follow our socials below.


